Installation
Supported Systems: The desktop app is officially supported only on Windows. Mac users can run it using virtual machines.
Install the RealityPlan Hub
The RealityPlan Hub is a standalone application that allows you to run and manage your projects.
To download and install the hub go to the Hub download page and click on download, after this run the installer and follow the steps it provides.

To install the hub you will need to have and administrator role in your computer, if you do not have this role please contact your IT department and direct them to the Hub deployment guide.
Login to the RealityPlan Hub
To download your environment first you need to open the hub and login to your account, to do this click on one of the login buttons hightlighted in the image below.
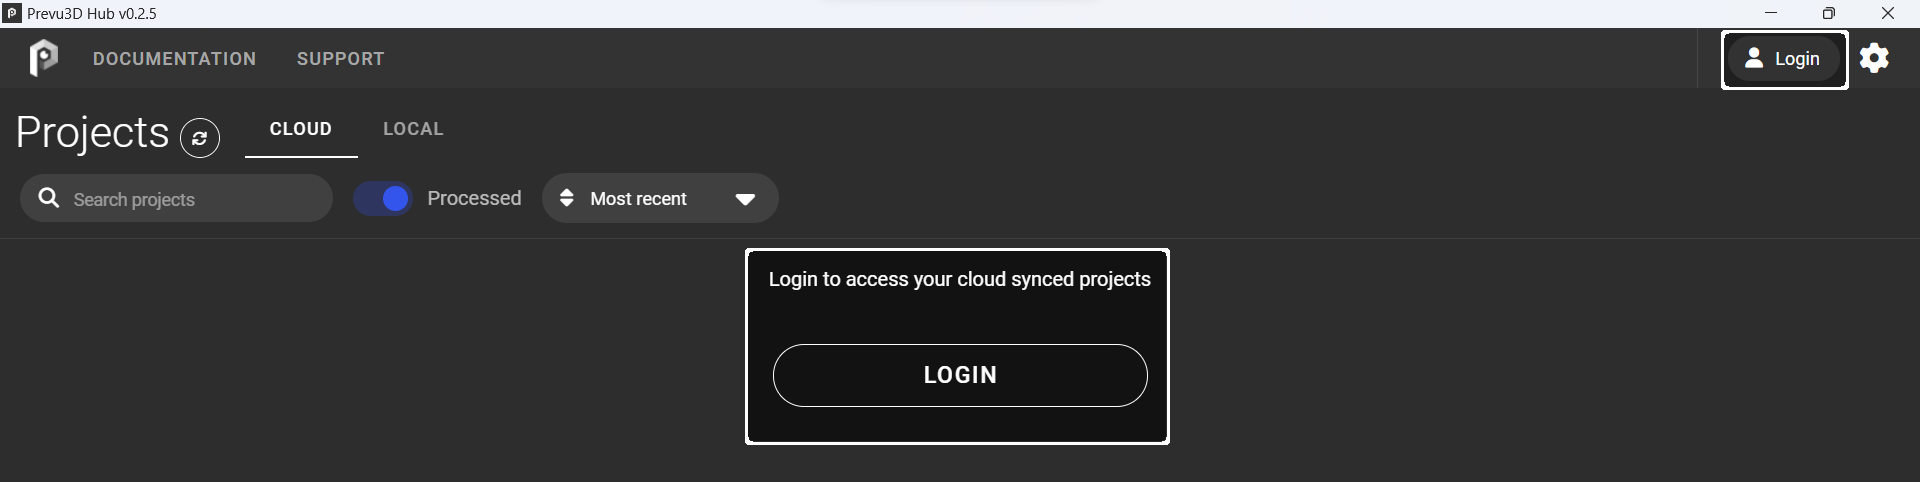
After pressing the login button a window should open on your browser asking you to login to the cloud platform, or, if you're already logged in to confirm that you want to login to the hub.
Interface overview
The hub interface is divided in 6 main areas as shown below:
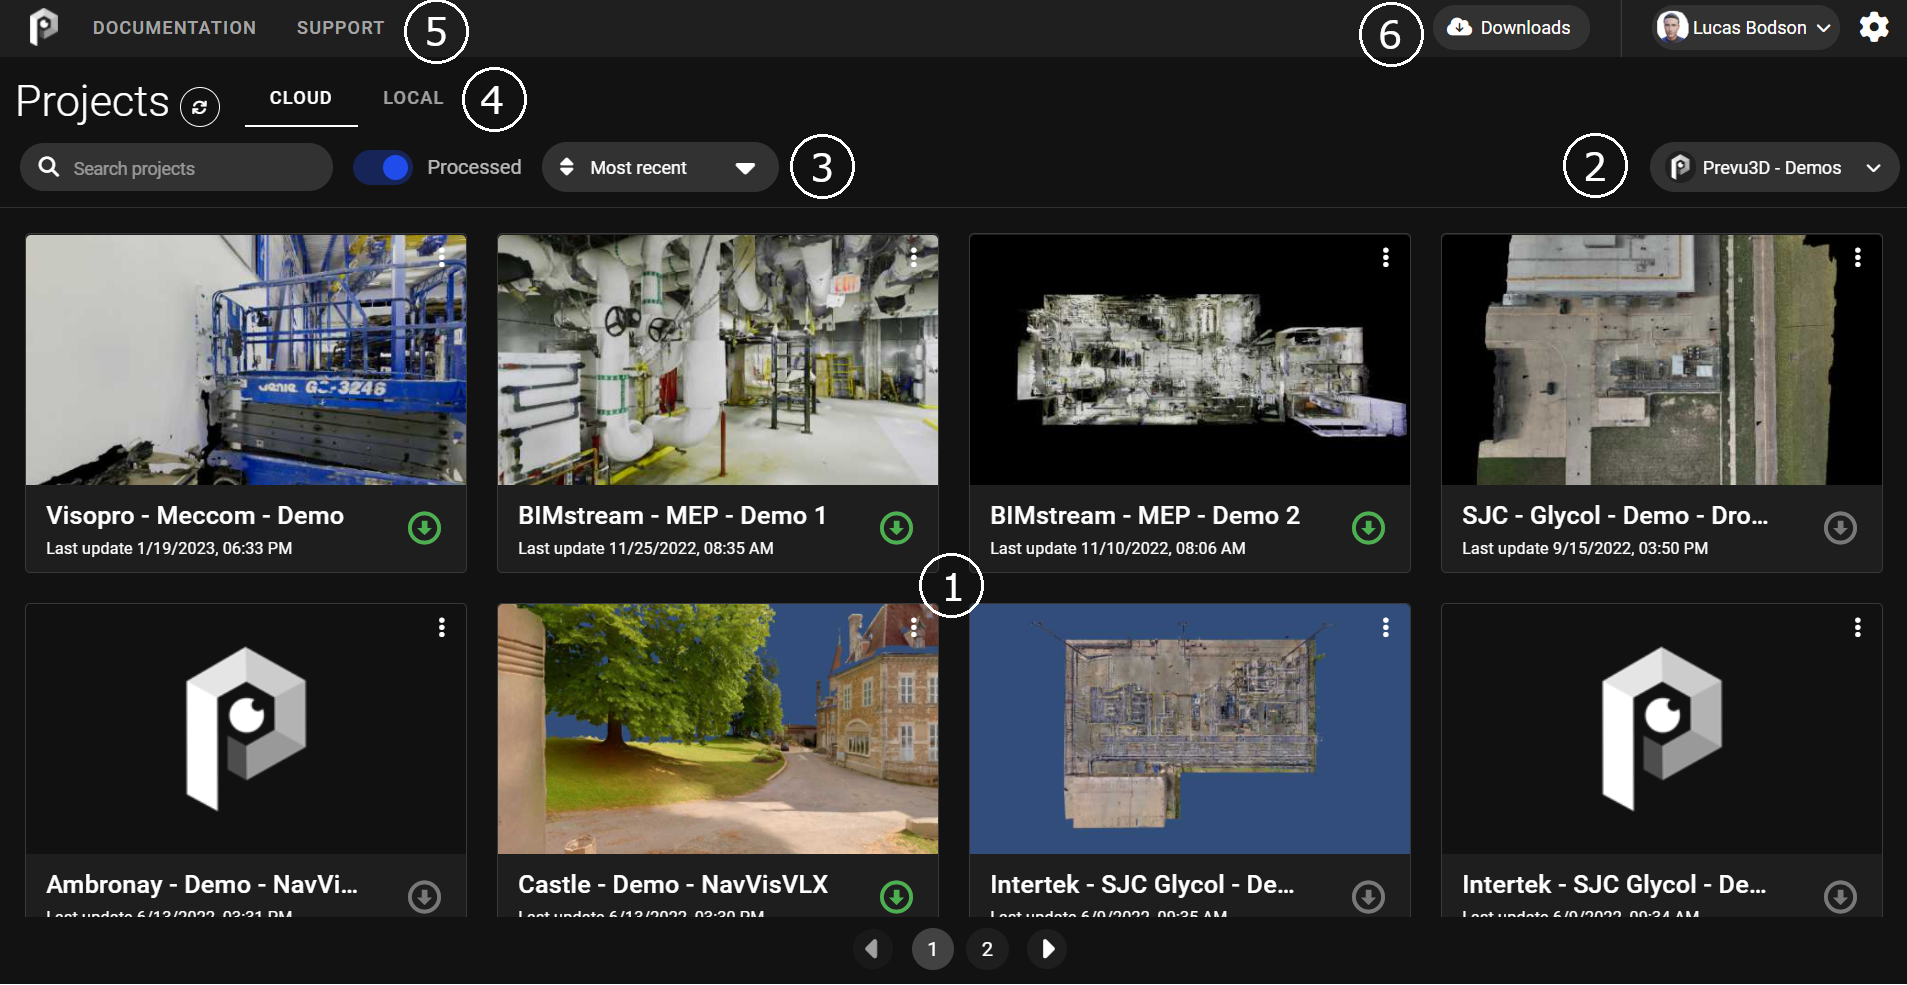
The components are the following:
- Area 1: Projects area. This is where your projects are displayed, you can launch them by clicking on them or download them by clicking on the arrow button on the bottom right.
- Area 2: Organization dropdown. You can click here to select which organization you want to load projects from if you are a member of multiple organizations.
- Area 3: Search tools. Here you have the search bar and some advanced filters to filter throught your projects.
- Area 4: Cloud/Local tabs. You can switch between seeing your already donwloaded project and all the projects in your organization. Local projects can be run even without an active internet connection.
- Area 5: Left topbar. In here you can acces relevant websites directly like the documentation or our support site.
- Area 6: Right topbar. In here you can acces the hub and account settings on top of the downloads page, where you can see all currently ongoing downloads.
Download your environment
Once your project has been processed on our cloud platform it will become available for download on the hub.
To download your environment search its name on the search bar and click on the download button, you will see the downloads window opening and showing you the state of your download.
If you have an already downloaded environment data folder you can save it in the projects folder indicated on the hub settings, and it will be added to the local page of the hub.
Running the application
You can inmmediately open the app by clicking on the desired environment. The project data will keep downloading while you run the app.
To run your environment while offline check that your environment has been fully downloaded.
Computer requirements and compatibility
Your 3D data is heavily optimized by Prevu3D. Therefore, visualizing your environment doesn't require a powerful PC:
| Specifications | Minimal | Recommended | Ultra |
|---|---|---|---|
| CPU | i5 (2017+, high frequency) | i7 (2019+, high frequency) | i7 (2021+, high frequency) |
| GPU | GTX 970 | RTX 2060 | RTX 2080 |
| RAM | 16 Gb | 32 Gb | 32 Gb |
Only Windows is supported.