Prevu3D supports the following scanners from Leica:
Examples of Leica software for processing:
Terrestrial Scanner (RTC360 / BLK360 / P20/ P40 / P50)
Leica has multiple software applications for registering and working with scan data, each having specific settings needed for proper use in Prevu3D.
Leica Cyclone Register 360
The Register 360 software offers a simplified workflow to register data from Leica scanners, and it is important to ensure proper settings are applied for quality export of data for Prevu3D.
Import Settings
Setting | Description |
|---|---|
| Change to maximum resolution of |
| For interior environments it can be beneficial to filter the range of data per setup to reduce noise. Typically this could be set at a maximum range of |
Export Settings
Once the registration is final and validated, the data can be exported to E57 format either as separate files or as one file. This format will include the structured point cloud and associated images per setup.
Step 1: From the export options, within the 'Publish Options', select the E57 (as separate files) option to export in the desired file format.
.png)
Step 2: The export can then be uploaded directly into the Prevu3D web application.
Leica Cyclone Register (Core)
If more robust registrations are required, Leica offers a higher end registration tool called Cyclone Register (Core). It is a separate solution from Register 360 which has some different settings for import and exporting.
Import Setting
Setting | Description |
|---|---|
| Change to maximum resolution of |
.png)
Export Settings
Once the registration is final and validated, the data can be exported to E57 format either as separate files or as one file. This format will include the structured point cloud and associated images per setup.
Step 1: From the export options, select E57 Format as the Export File Type and select a containing folder.
.png)
Step 2: Select Export Scans, Export Images and Use Setup Name as Scan Name when finalizing the export.
.png)
Step 3: The export can then be uploaded directly into the Prevu3D web application.
SLAM Scanner (BLK2GO / BLK2GO Pulse)
Leica Cyclone Register 360 PLUS (BLK Edition)
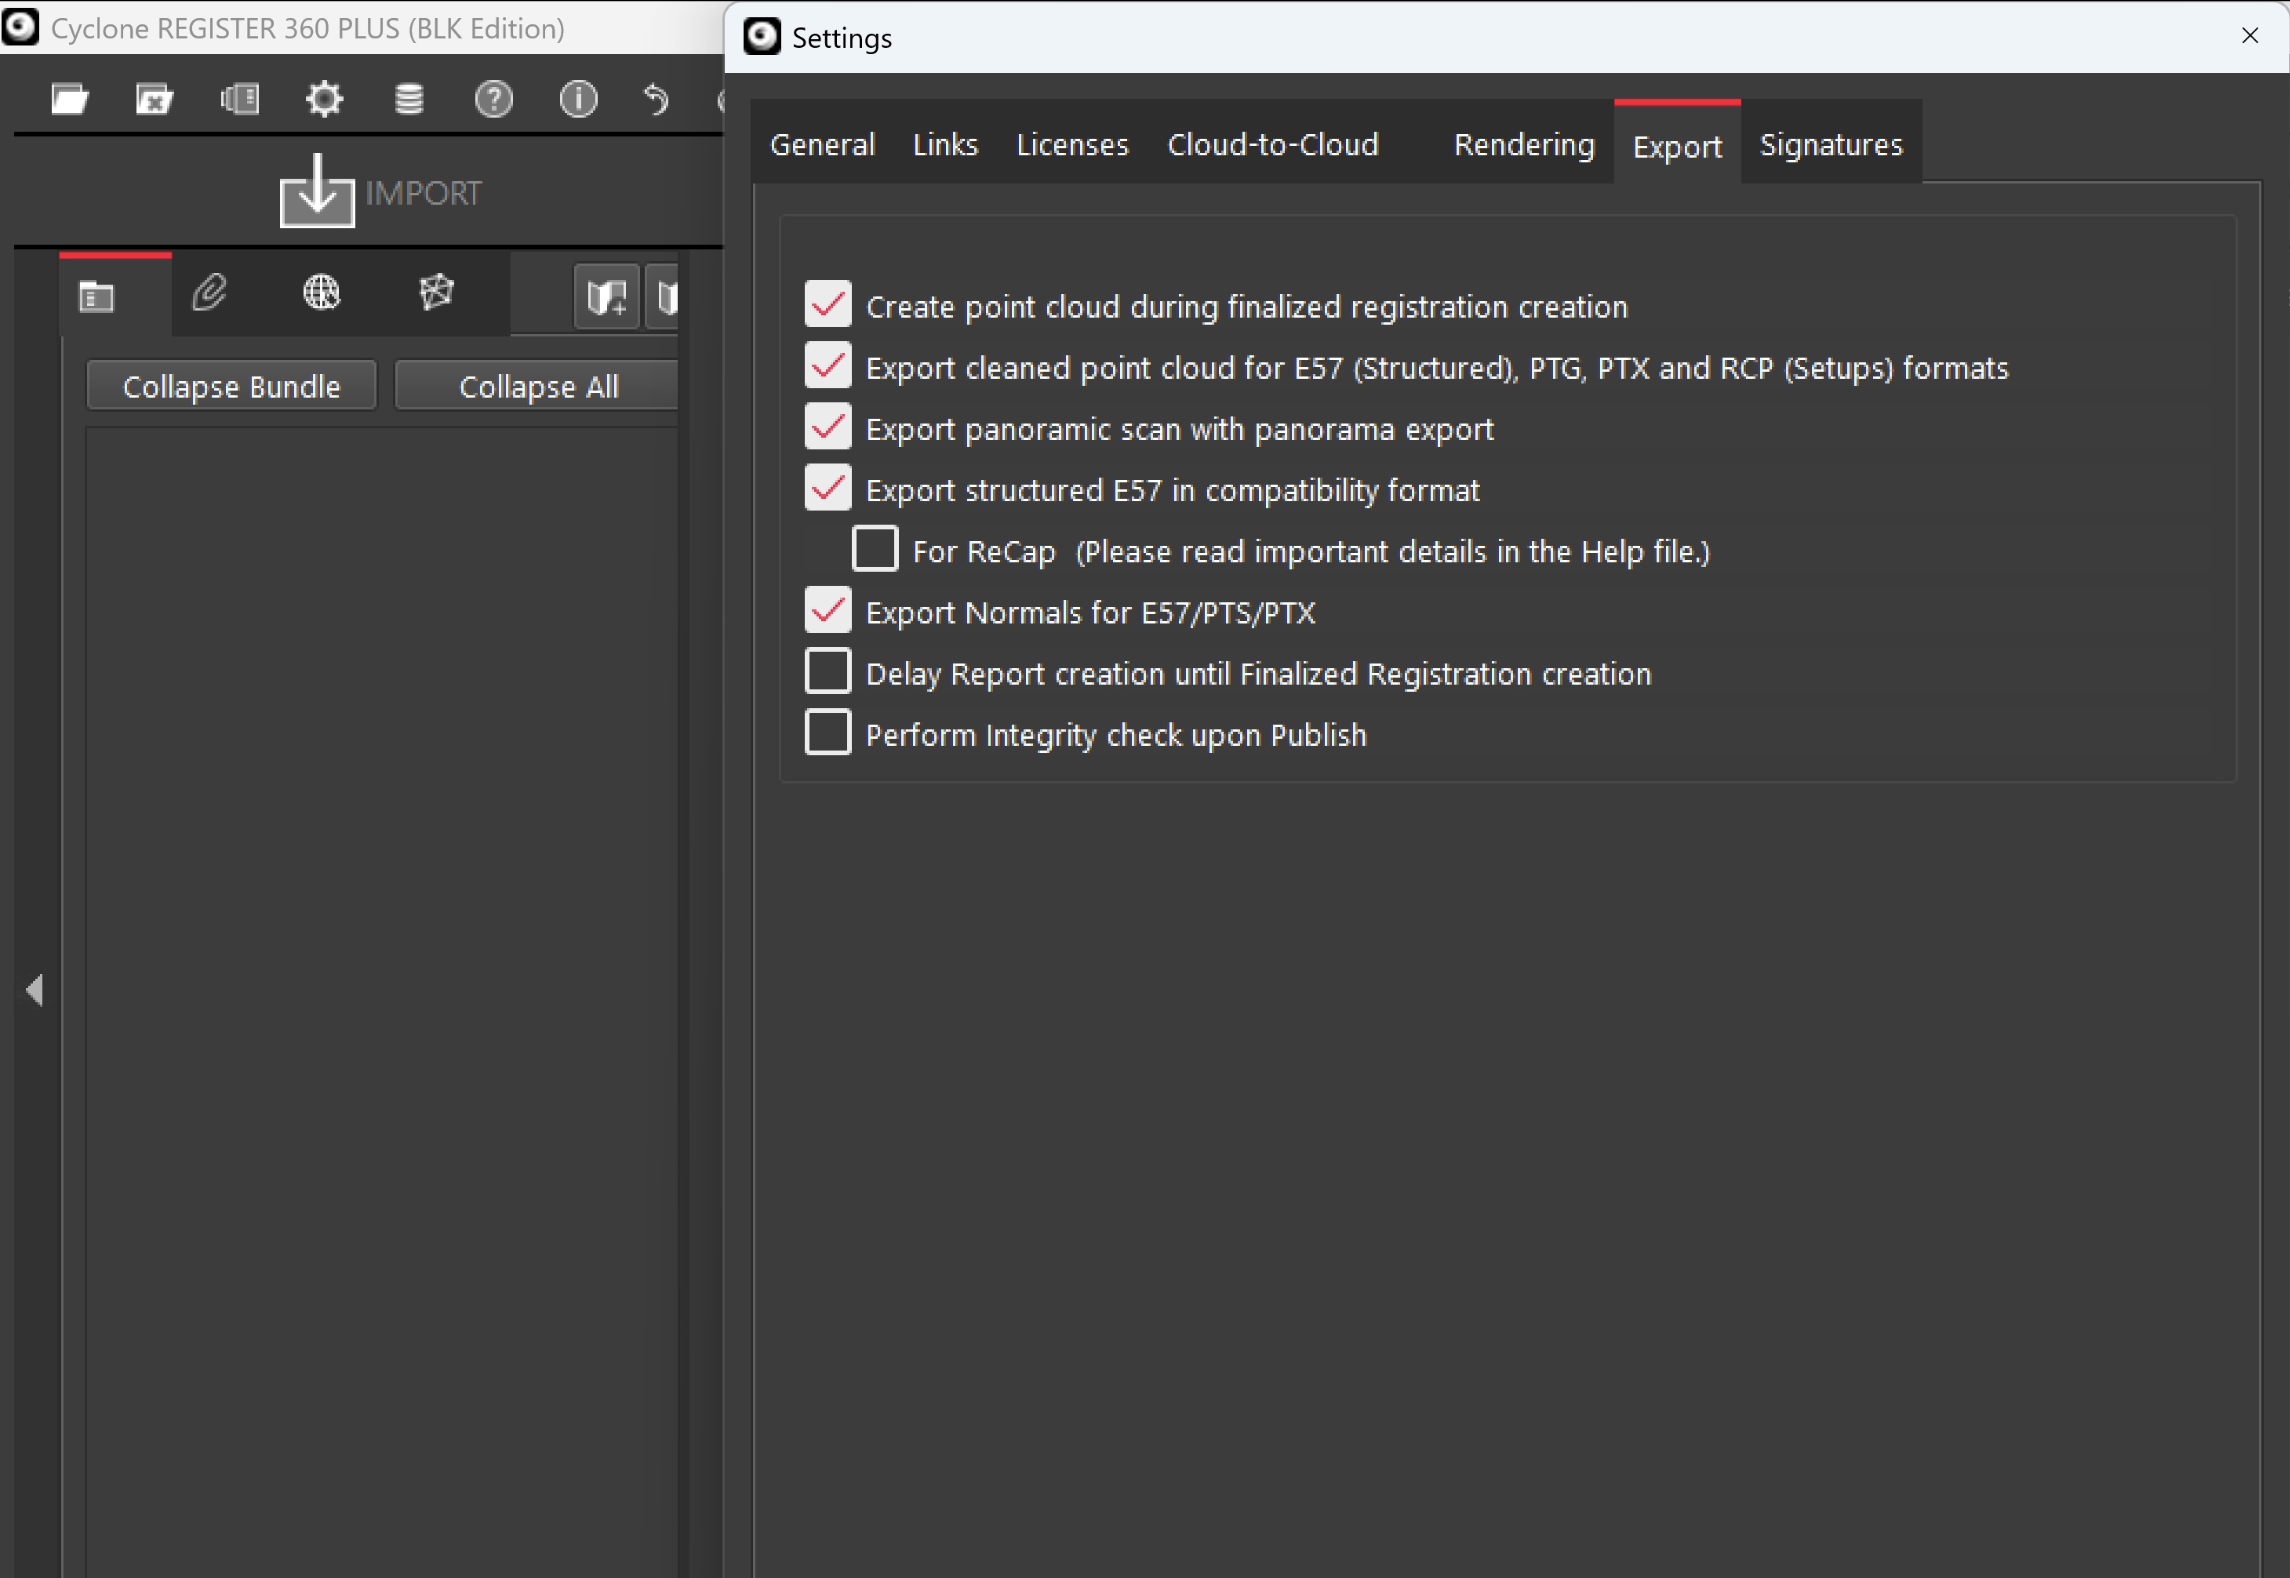
The Cyclone Register 360 PLUS (BLK Edition) is required to properly export data for Prevu3D.
Export Settings
Prevu3D requires an e57 with normals to process BLK2GO dataset.
Step 1: From the export options, select “Export Normals for E57/PTS/PTX"“. .

Compared to Terrestrial scanners, the SLAM based devices doesn’t produce a “structured” e57.
Step 2: From the export options, within the 'Publish Options', select the E57 (as one file) option to export in the desired file format.
Step 3: Select the export as ‘Single point cloud (unstructured)’ option.
.png)