XGRIDS
Prevu3D supports the following scanners from XGRIDS:
-
Lixel K1
-
Lixel L2
-
Lixel L2 Pro
Examples of XGRIDS software for processing:
Data Processing
Section titled “Data Processing”Export Settings
Section titled “Export Settings”Step 1: Process the scans
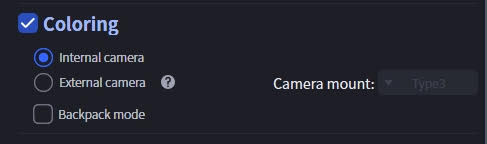
From your LixelStudio, process the scans. Make sure to select “Output panoramic images” in the coloring settings for project processing.
Regarding the point cloud coloring options, follow the best practices from XGrids. Depending on the device model, you might want to choose internal camera or external camera.
Step 2: Gather the required files
After processing the raw data from the scanner using LixelStudio, you will receive a post-processed result folder. All the data you need should be located within this folder. Please refer to the images below for guidance on the file structure and relevant outputs.
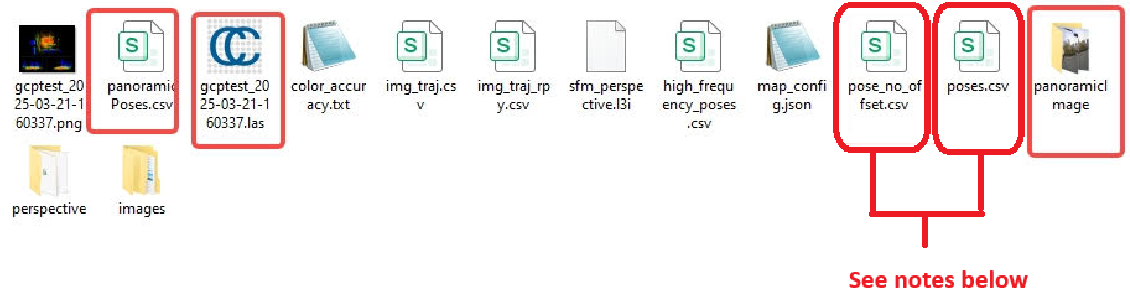
Prevu3D requires the following files to process XGrids datasets:
-
Pointcloud (.LAS)
-
Trajectory (poses.csv or pose_no_offset.csv)
-
[Optional] Panoramas (jpg)
-
[Optional] Panoramas informations (panoramicPoses.csv)
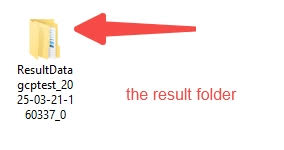
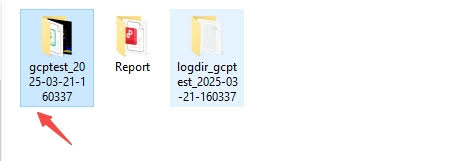
Click the Open folder of your processing:
.png")
There will be three folders: one for the PDF report, one for the processing results, and one for the algorithm logs. Click into the processing results folder (named after your raw data).
Then you will find the result .las file which is the processed point cloud file. The pose.csv & pose_no_offset.csv are the trajectory data. If you have ticked “output panoramic images” in the coloring setting for project processing, you’ll also see a “panoramicImages” folder containing all the panoramas. The panoramicPoses.csv contains the photo info such as timestamp and xyz location and posture (quarternion or row pitch yaw).
Step 3: Import into Prevu3D
The files generated in Step 2 can now be uploaded to Prevu3D.