NavVis
Prevu3D supports the following scanners from NavVis:
-
NavVis VLX (preferred)
-
NavVis M6
Data Collection
Section titled “Data Collection”In order to achieve the highest quality results, the following is required:
| Quality | Requirement |
|---|---|
| High overlap | Capturing areas with high overlap between passes to ensure there is little to no occlusion |
| Many images | Capture as many images as possible. Ideally panoramic images should be collected every 3 meters |
| Loop closures | Improves accuracy and error correction |
| Control points | For large scans this is recommended to reduce drift |
Data processing
Section titled “Data processing”NavVis IVION Processing Settings
Section titled “NavVis IVION Processing Settings”Select the following processing settings:
.png")
NavVis IVION Crop and Download
Section titled “NavVis IVION Crop and Download”NEW! It is now possible to use the Crop and Download option in NavVis’ IVION software to download e57 files with panoramas. This feature allows NavVis point cloud data that was captured without control points to be aligned in IVION and exported in a compatible format for Prevu3D meshing. You can find more information on this feature in this documentation by Navvis.
.png")
Sitemaker Processing Settings (Linux)
Section titled “Sitemaker Processing Settings (Linux)”Select the following processing settings:
| Setting |
|---|
| Point Cloud Resolution: 5mm |
| Point Cloud Format: ply |
| Colorize point cloud: True |
| Generate panoramic images: True |
.png")
If you are using Navvis Sitemaker to process your Navvis scans, you can retrieve the .nvd files from the generated datasets_web folder, and import these into IVION. From here, you can follow the usual workflow with the crop and download feature to export e57 files with panorama images.
Texture Projection Option
Section titled “Texture Projection Option”When uploading NavVis datasets, two options are available in the Upload Wizard to control how textures are applied to the 3D mesh.
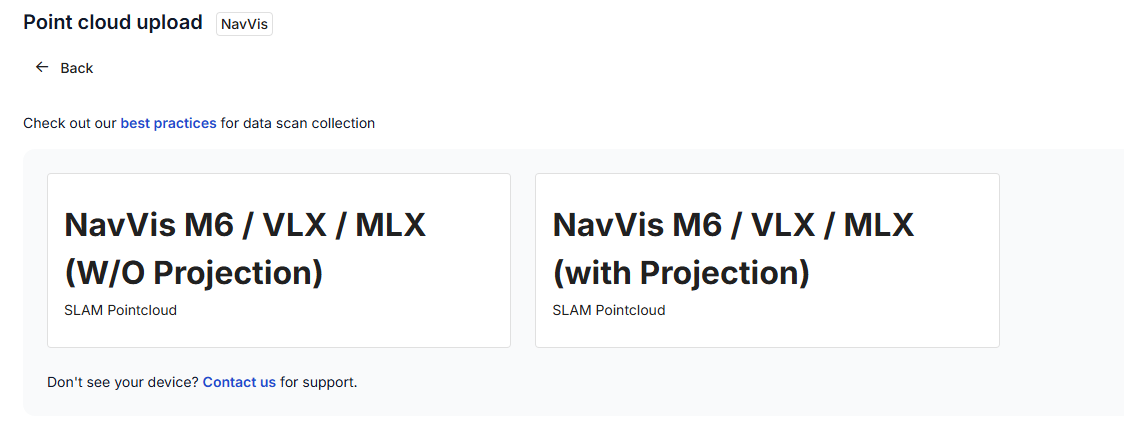
Option 1: Without Projection
Section titled “Option 1: Without Projection”Disable Texture Projection (Recommended for consistency)
The mesh will be colored using point cloud color data only, without projecting panoramic images.
Benefits:
-
Produces a more uniform and stable appearance
-
Reduces visual artifacts caused by image distortion
Trade-offs:
-
May appear slightly blurred, as colors are interpolated from point data
-
Fine details (e.g., text or small features) may be less sharp
Option 2 : With Projection
Section titled “Option 2 : With Projection”Enable Texture Projection (Recommended for realism)
Prevu3D projects panoramic (360°) images onto the mesh to enhance visual quality.
Benefits:
-
Produces highly detailed and realistic visuals
-
Leverages the full quality of NavVis imagery
-
Best suited for visual inspection and immersive navigation
Trade-offs:
-
May introduce visual artifacts such as distortion or misalignment
-
Can result in less consistent appearance across the model
-
Not ideal for workflows requiring high visual accuracy
Examples
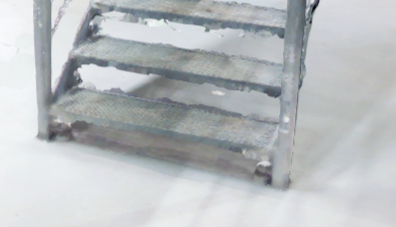
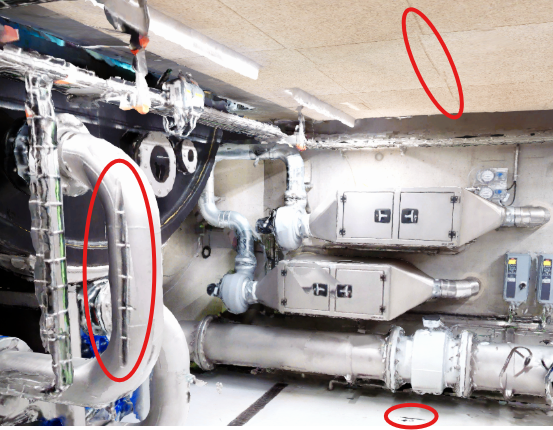
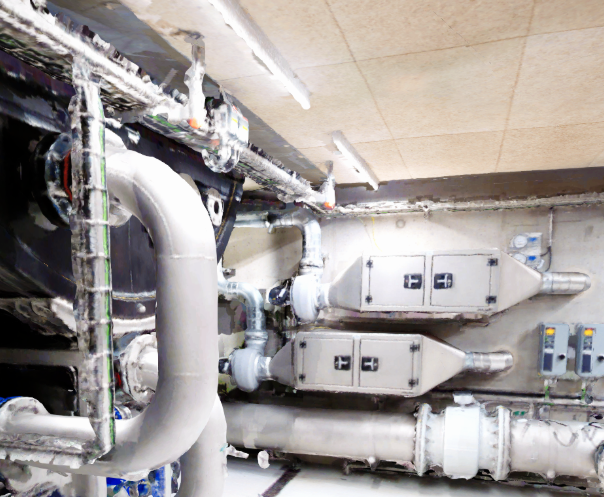
Section titled “Examples”Potential Artifacts with Texture Projection.
The example below left illustrates common artifacts that may occur when texture projection is enabled:
-
Distortion on curved surfaces (e.g., pipes)
-
Inconsistent texture blending on ceilings or flat areas
-
Minor misalignment or ghosting on floors
Benefits of Texture Projection
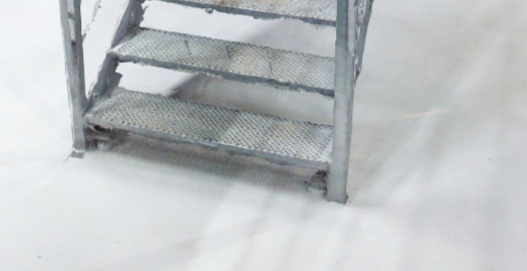
In contrast, the example below right illustrates how texture projection can significantly improve visual quality:
-
Enhanced detail on surfaces (e.g., stair grating)
-
More realistic and immersive representation