Quick Start
The following is a tutorial to follow from the Prevu3D landing page
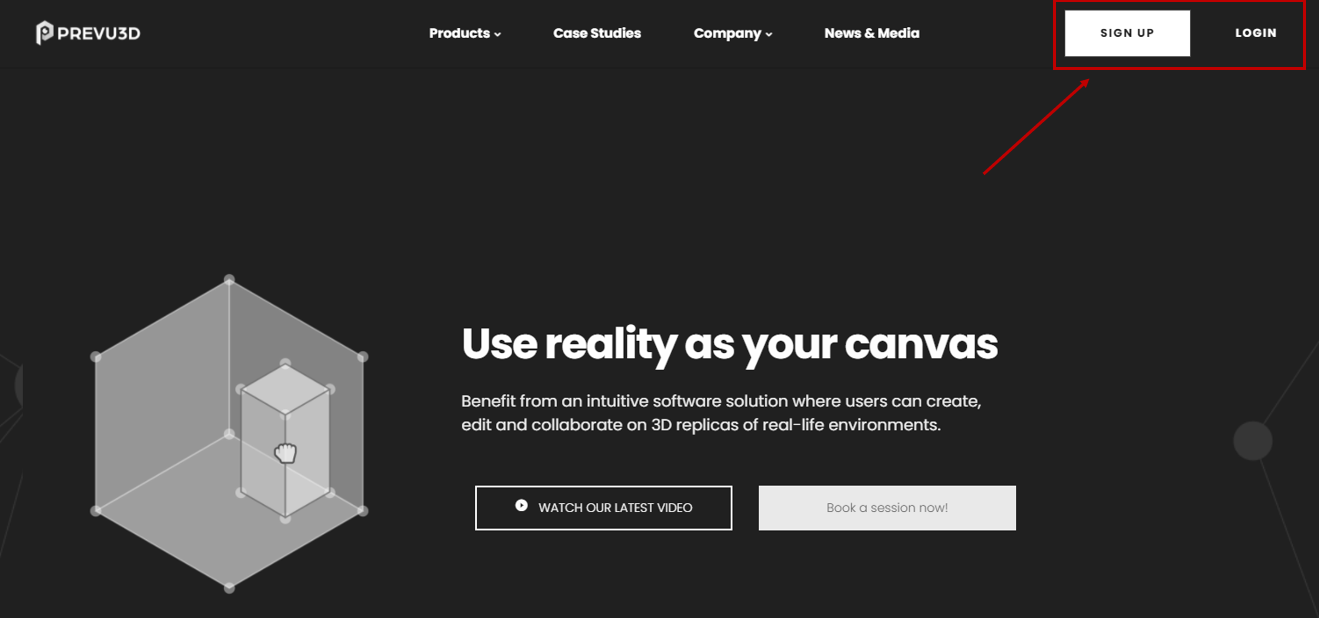
Step 1: Login / Sign up
To get started, users will need to either sign-up or log in by selecting an option in the top-right of the landing page.
New users will need create an account by selecting
SIGN UP.Existing users can simply enter their credentials by selecting
LOGIN.
Once the account has been successfully verified, users will be navigated to the project page.
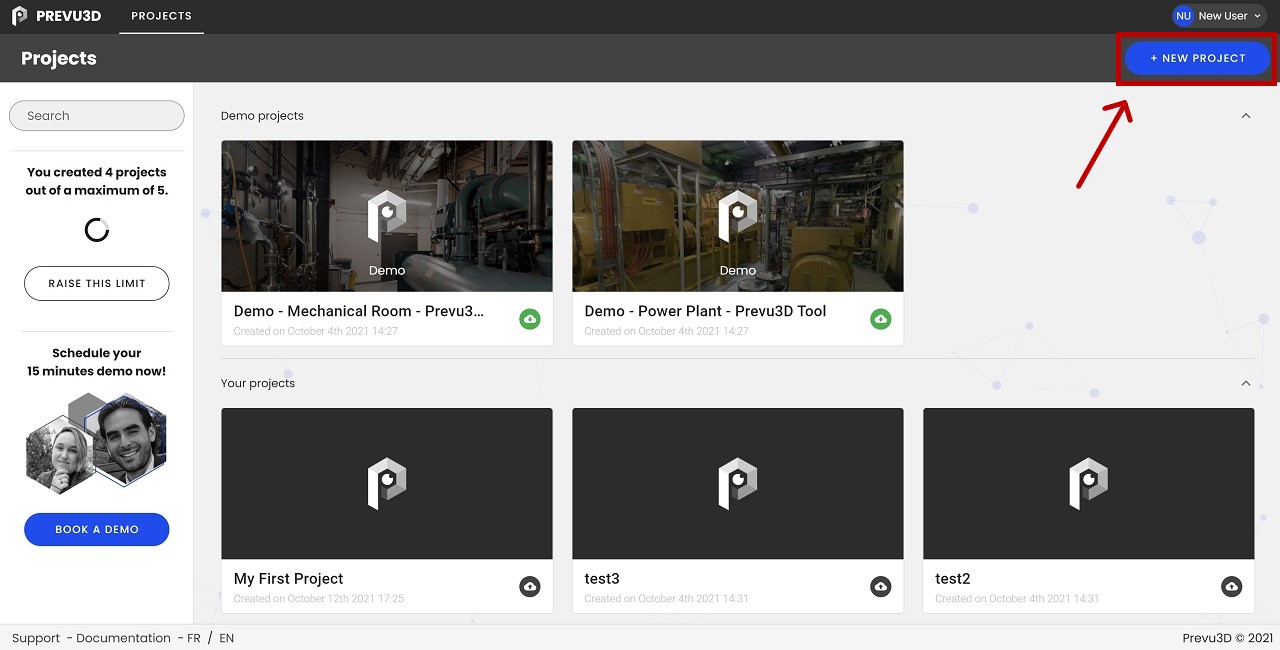
Step 2: Create a new project
Once logged in, users will be able to create and name a new project.
1. Create the project
To create a new project, click on the + NEW PROJECT button located at the top-right of the projects page.
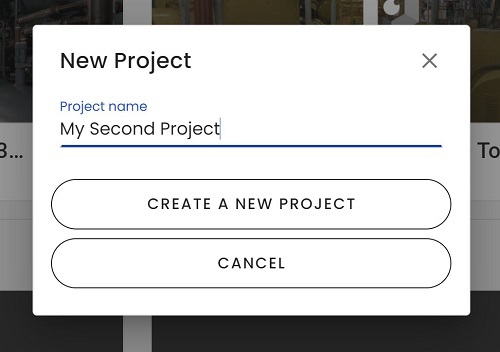
2. Name the project
When creating a new project, users will be prompted to provide a name for the project.
There exists two pre-made demo projects ready to download and explore. Both projects showcase a few of the powerful tools of the Prevu3D application.
Step 3: Upload scans
Before uploading the scan data, it is necessary to prepare and export the data from the scanner and software.
To learn more about the export process, please read the Data collection documentation.
When ready to upload the data to the Prevu3D processing pipeline, select the format you wish and drag and drop the files in the designated area, or browse files to select them from your computer's directory.
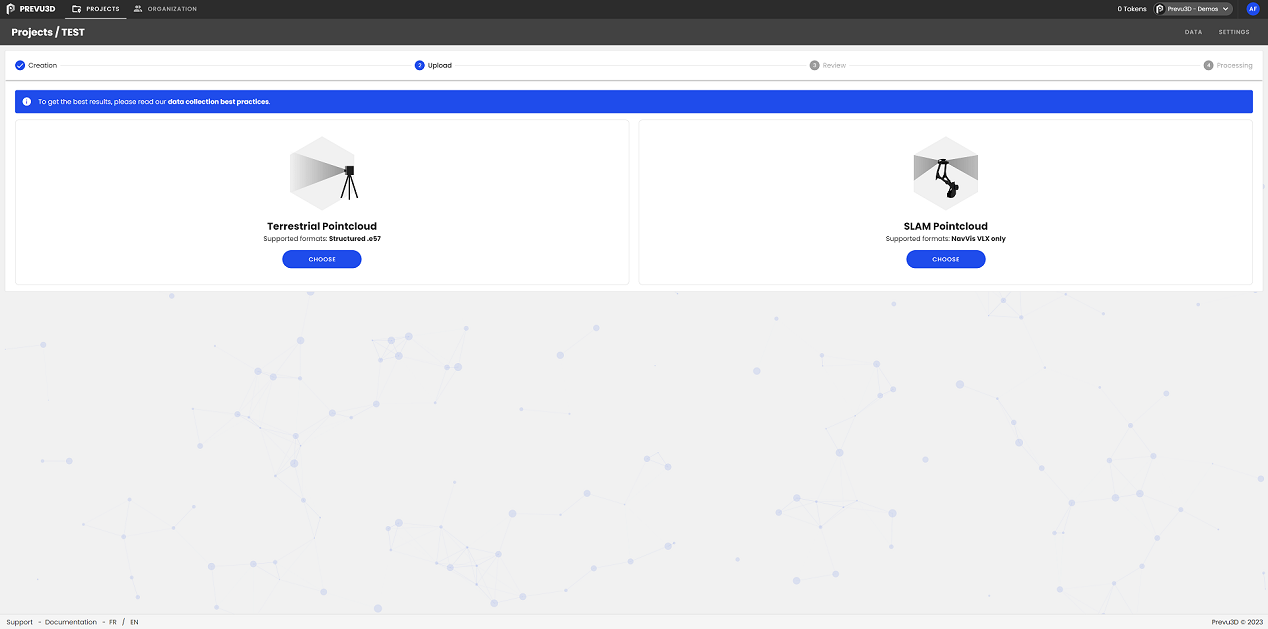
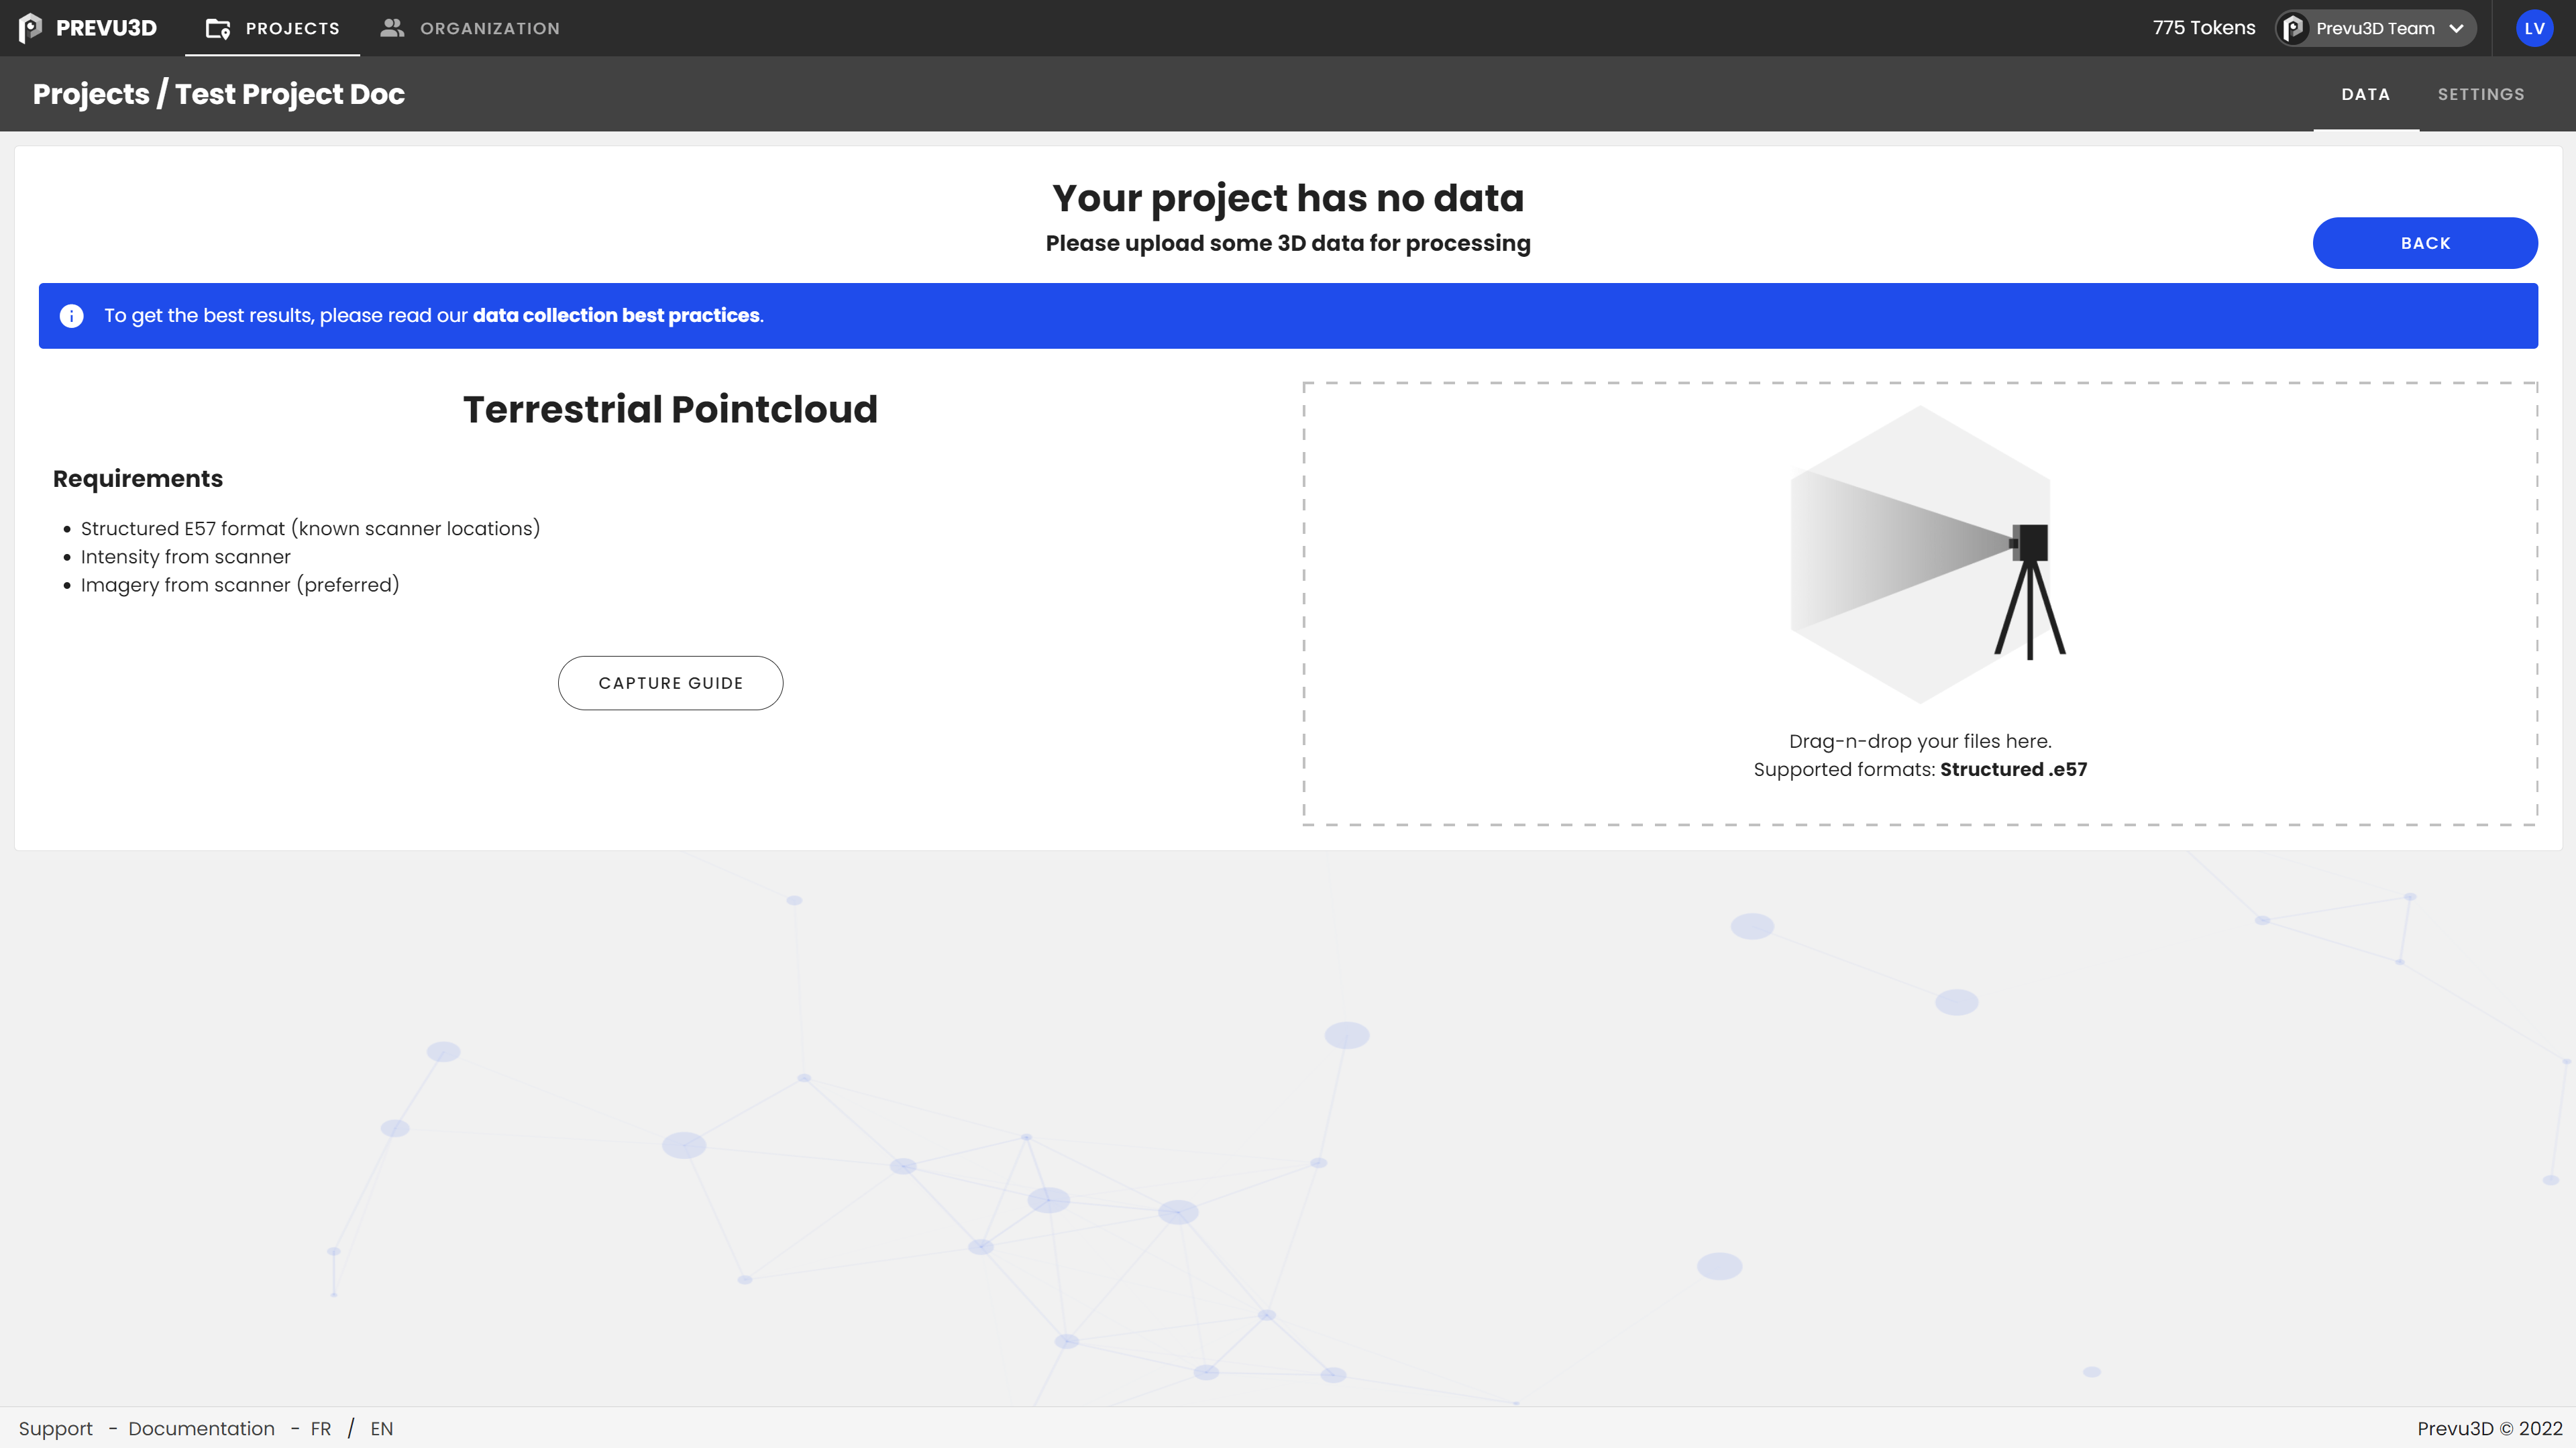
For meshes only, it is required to zip the mesh files all together (.obj with .mtl and textures for example) prior to upload. This does not apply to pointclouds (.e57) which must be uploaded directly without zipping.
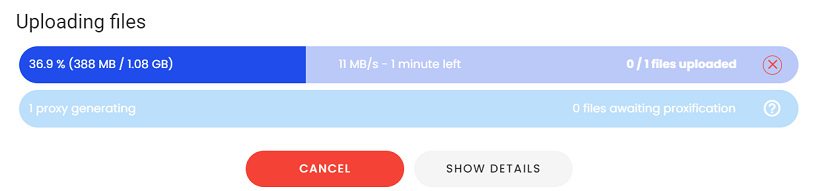
Once the file is selected to be processed, a progress bar will appear, visualizing the progression of the upload.
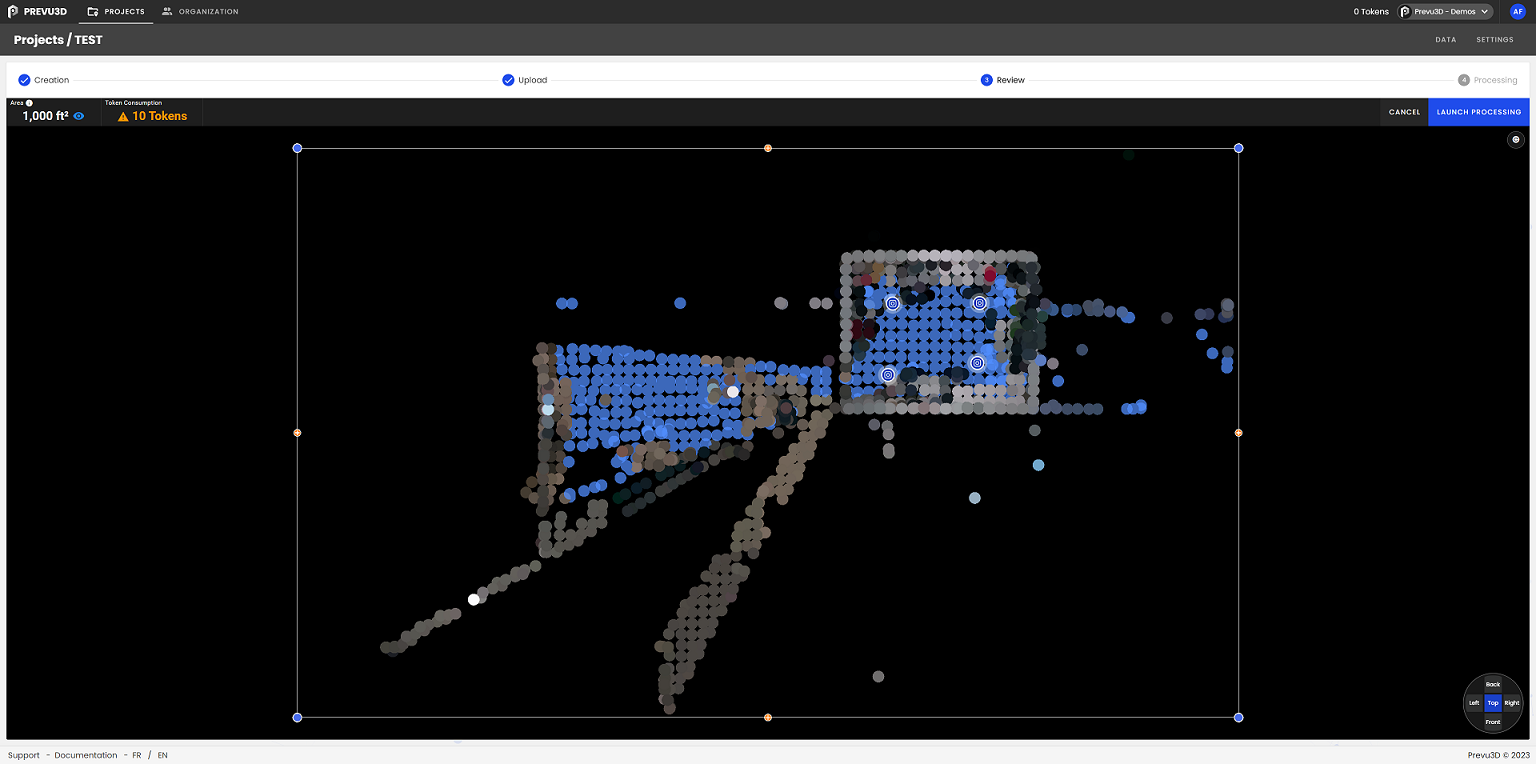
Step 4: Review data
Once the files are finished uploading, you can review the point your point cloud data with the project editor.
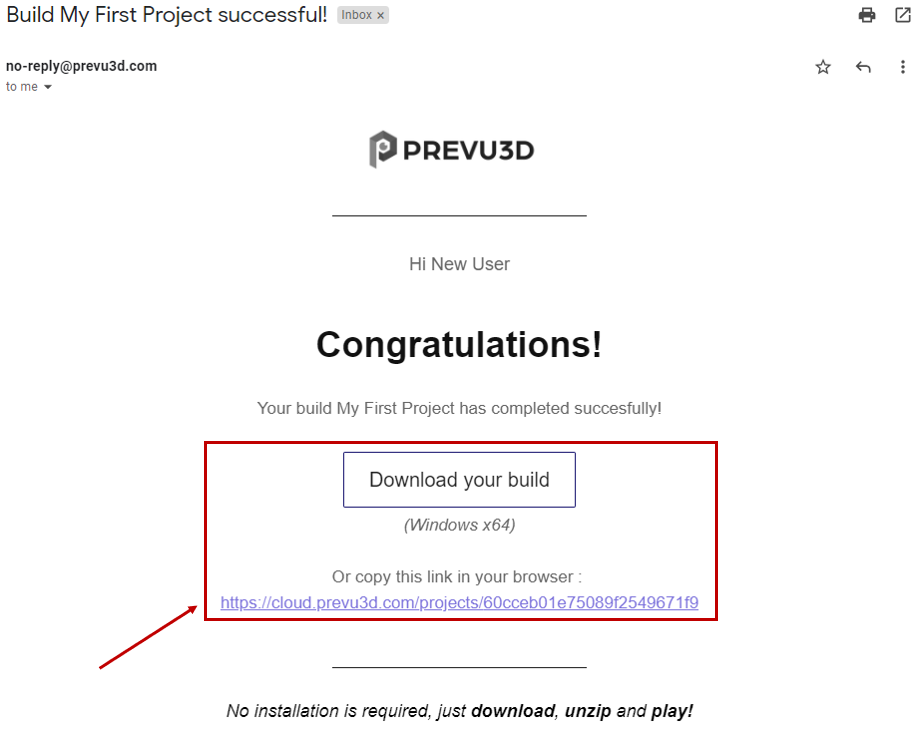
Step 5: Download result
Once the upload has completed, the files are sent for further processing. An email will be sent to the user once the data processing has completed and is ready for download.
The time required for processing the data depends on the size of the file.
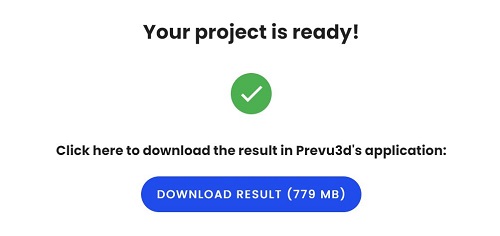
Once the data has been processed, the download information will be sent via email to the recipient with further details on running the application.
To learn more about the application and how to use it, please read the Application Documentation.