Zones
Zones provide a powerful way to organize, structure, and navigate large Twins. They allow users to define spatial areas inside a Twin and automatically group assets based on their location. This improves data organization, searchability, and overall Twin navigation.
What Are Zones
Section titled “What Are Zones”Zones are user-defined 3D areas that segment a Twin into meaningful regions. They can represent rooms, departments, operational areas, production lines, or any spatial grouping that matters to your workflow.
A Zone can include:
-
A custom geometry (box or polygon)
-
A name
-
Optional metadata
-
Automatically assigned assets based on the Zone’s boundaries
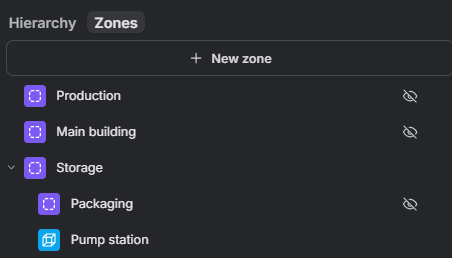
Zones appear in a dedicated view and can be managed from a dedicated panel.
Creating Zones
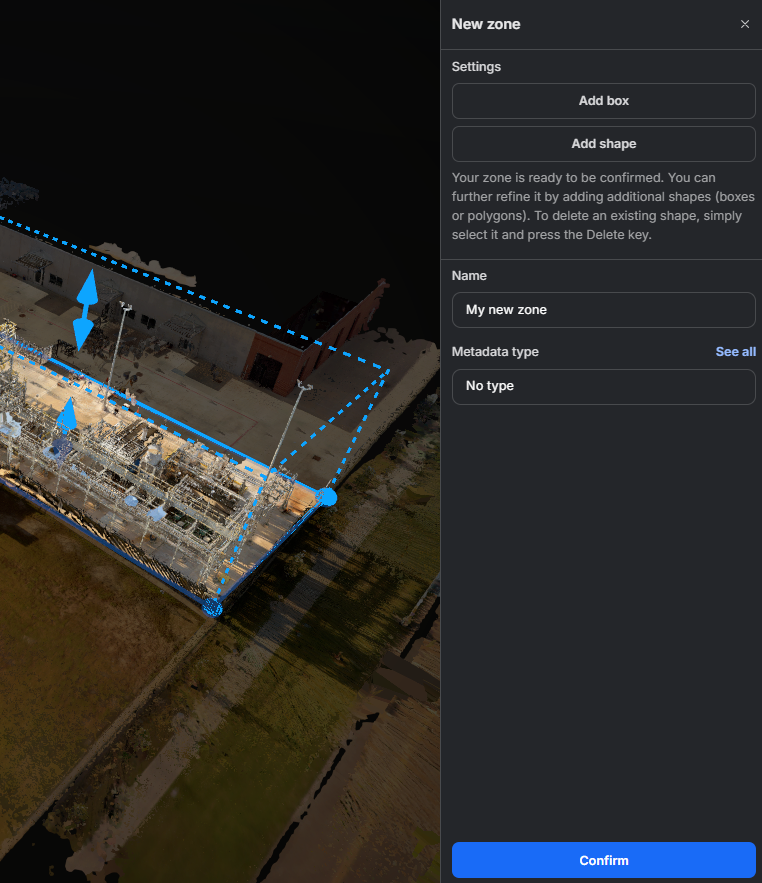
Section titled “Creating Zones”You can create and manage Zones from the Zones tab of the Hierarchy panel. From here, press + New zone to create a new Zone. Zones can also be nested inside one another to mirror how your space is structured.
During creation, shape your Zone with one or more:
-
Boxes — add a rectangular 3D box to enclose your area (Add box).
-
Shapes — draw a custom polygon footprint for irregular or non-rectangular spaces (Add shape).
You can combine several boxes and shapes to refine a single Zone. Give the Zone a name and, optionally, assign a metadata type. Once you are satisfied, press Confirm to finalize your Zone.
Editing Zones
Section titled “Editing Zones”Zones remain fully editable after creation. Users can modify the shape, boundaries, or metadata at any time to keep the Twin organized as the environment evolves.
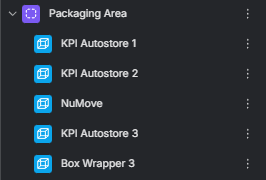
Automatic Asset Grouping
Section titled “Automatic Asset Grouping”All assets located within a Zone’s defined boundaries are automatically listed under that Zone in the left-side panel. There is no manual assignment required.
Nesting is computed the same way: a Zone that falls within another Zone’s boundaries is automatically nested under it, so the Zone hierarchy mirrors your space without any manual arrangement.
This allows users to:
-
Quickly identify what assets belong to each spatial area
-
Maintain a clean Twin hierarchy
-
Structure assets in a way that matches real-world layout and operations