Organization
Your company’s Prevu3D account (tenant).
Everything — users, groups, roles, licenses, divisions, sites, and files — lives inside one organization. You log in at cloud.prevu3d.com or your white-label URL.
User management overview →Let’s get you started! Follow this step-by-step guide to set up your account, invite your team, get your data in, and start working with your Prevu3D solution.
Capture. Manage. Connect. Prevu3D brings your as-built world into the tools and workflows your teams already use. RealityPlatform is your cloud hub for uploading, organizing, viewing, and sharing 3D data. RealityTwin, RealityPlan, and RealityConnect extend that data into digital-twin, planning, CAD/BIM, and simulation workflows.
Invite users, roles, licenses, and org structure.
Start Phase 1 →Upload, process, and explore data.
Start Phase 3 →Plugins for Revit, NX, Inventor, and more.
RealityConnect →Organization vs Division vs Site, Data Bundle, products.
Read vocabulary →The onboarding doc links out to many articles. These short definitions keep you oriented — open any linked article for the full guide.
Your company’s Prevu3D account (tenant).
Everything — users, groups, roles, licenses, divisions, sites, and files — lives inside one organization. You log in at cloud.prevu3d.com or your white-label URL.
User management overview →Top-level content grouping inside your organization.
Segment data by region, business unit, or (for EPCs) by customer so projects stay isolated. Access granted at Division level flows down to every Site and File inside it.
Example: “North America Operations”, “Client ABC Projects”
Organizational structure →A physical facility or location inside a Division.
Sites contain Data Bundles, folders, RealityPlan Projects, and documents. Add an address or coordinates to enable Map View across facilities.
Example: “Chicago Plant” under North America Operations
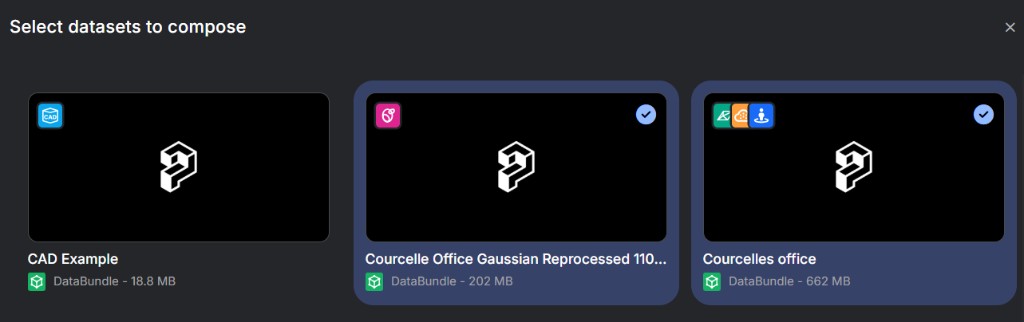
One capture session — raw uploads plus all processed outputs.
Upload once, then process into point cloud, mesh, photosphere, Gaussian splat, and exports. Powers every Prevu3D product.
Introducing Data Bundles →A RealityPlan layout stored in the platform.
Web RealityPlan supports review and collaboration; the RealityPlan Hub desktop app adds advanced engineering tools (clash, visual compare, CAD export).
A tagged 3D object with metadata.
Used in RealityTwin and RealityPlan to represent equipment, link to ERP/CMMS records, run clash detection, and attach documentation.
Access and sharing follow this tree. Permissions on a parent apply to everything below unless refined.
Organization ← your Prevu3D account (tenant)└── Division ← region, BU, or customer (EPC) └── Site ← physical facility └── Files ├── Data Bundle ← upload & process scans here ├── Folder ├── RealityPlan Project └── Documents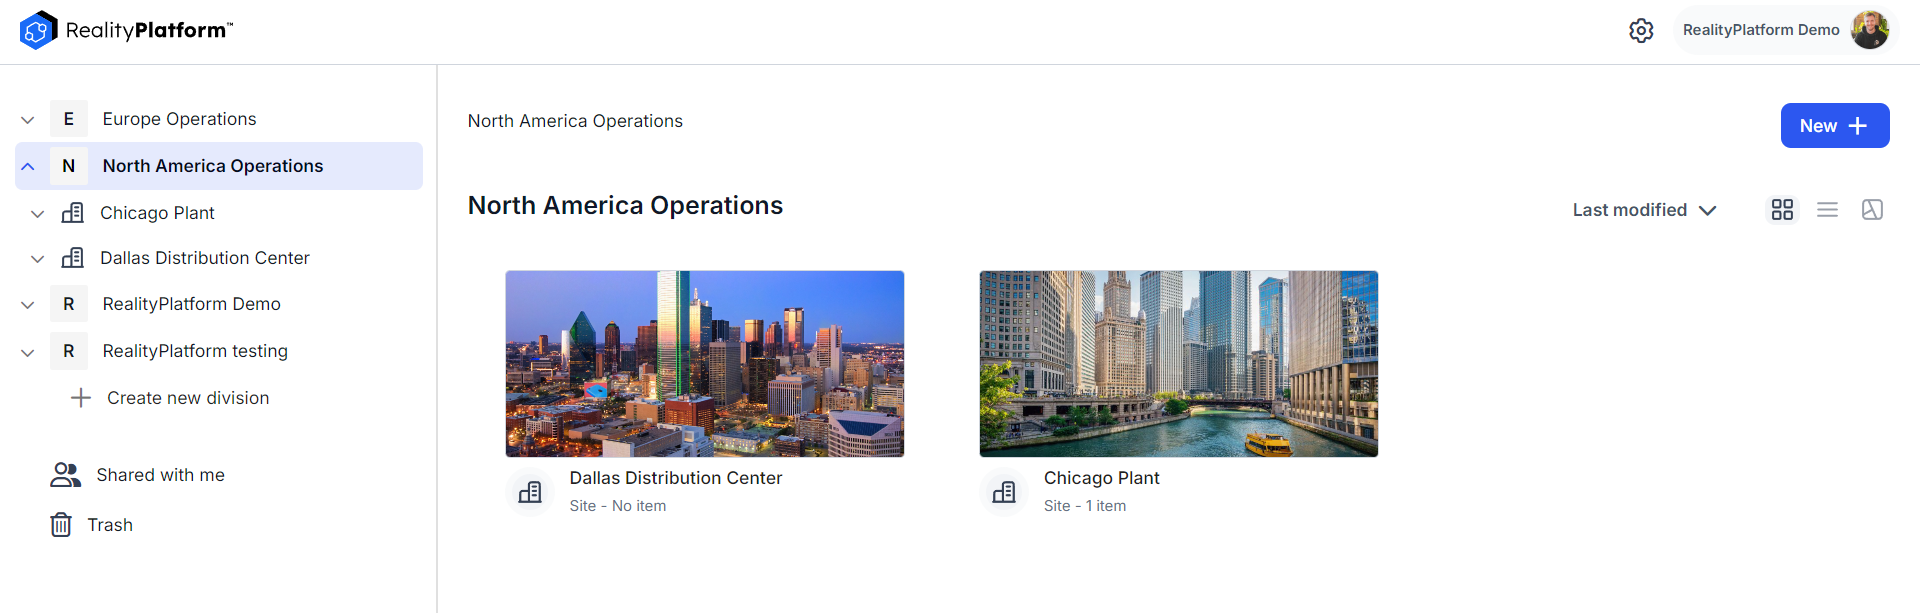
Invite to a Division → user sees all Sites and Files inside. Invite to a Site → user sees all Files in that Site only. Share a single File → granular access without exposing siblings. Full sharing guide →
RealityPlatform is the cloud hub. RealityTwin, RealityPlan, and RealityConnect extend the same processed Data Bundles into operations, design, and CAD workflows.
| Product | In one sentence | Typical use | Where it runs |
|---|---|---|---|
| RealityPlatform | Cloud hub to upload, organize, process, view, and share 3D data | Store scans, manage users, validate quality in 3D Data Viewer | Browser |
| RealityTwin | Interactive digital twin merging scans with assets, zones, and integrations | Remote inspections, asset registry, operations and maintenance | Browser |
| RealityPlan | Engineering layouts on reality capture with clash detection and CAD export | Layout planning, visual compare, design iteration | Desktop Hub + Web (from Twin) |
| RealityConnect | Plugins streaming twin/bundle data into CAD/BIM tools | Revit, Inventor, NX, MicroStation, Omniverse, Process Simulate | Inside your CAD app |
Everyone · Steps 1–3
When invited to your organization’s instance, you’ll receive an email invitation to join through RealityPlatform.
New users: click the invitation link, then complete registration.
Existing users: log in and accept the invite to access shared content across the Division, Site, project, or Data Bundle.
Why this matters: Your RealityPlatform account is the central hub for projects, datasets, collaboration tools, and desktop products tied to your organization and credentials.
If you were told you have admin rights but do not see your organization, Division, or user-management options after login, contact your Customer Success manager or support@prevu3d.com.
Access RealityPlatform at cloud.prevu3d.com or your organization’s white-label URL ({domain}.prevu3d.com). Bookmark it for quick access. You can also use the Login button on the main Prevu3D website.
Why this matters: Bookmarking your login page saves time on every visit and ensures you always land in the right place for your as-built projects.
Why this matters: A complete profile makes collaboration clearer for teammates; your avatar is how you’re represented in 3D environments.
Admins · Steps 4–6
Read how Divisions, Sites, and files fit together, and review your active subscription and usage.
Why this matters: Knowing how organizations, sites, and assets fit together helps you organize data sensibly from day one and avoid restructuring later.
Why this matters: Getting roles right early follows least privilege — people see exactly what they need, nothing more. RealityPlatform supports unlimited users; invite everyone who needs the data.
Your plan includes floating licenses for RealityPlan, RealityTwin, and RealityConnect. Instead of named seats, you control product access through roles (Step 5). Licenses are claimed from a shared pool when someone opens a product and released when they close it. Track live usage in Usage Summary.
Why this matters: Floating (concurrent) licenses mean you pay for simultaneous users, not named seats — anyone with access can use a product whenever a license is free.
All users · Steps 7–11
Why this matters: A Site is the container you upload into and the place your team returns to for location data. Creating it first gives every dataset, mesh, and project a clear home.
Review the Data Collection guidelines and confirm your device or capture method is supported. Prevu3D works with TLS point clouds (Leica, Faro, Trimble), SLAM (XGrids, NavVis), drone and handheld 360° photogrammetry, mesh data, and other file types.
Why this matters: Capture quality sets the ceiling for everything downstream. You don’t need survey-grade hardware to start — handheld 360° cameras through terrestrial lidar are supported. Confirming your method before going on-site avoids wasted trips and failed uploads.
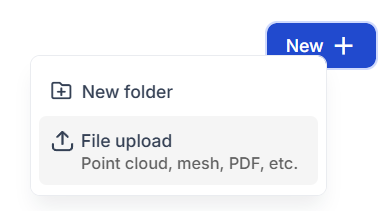
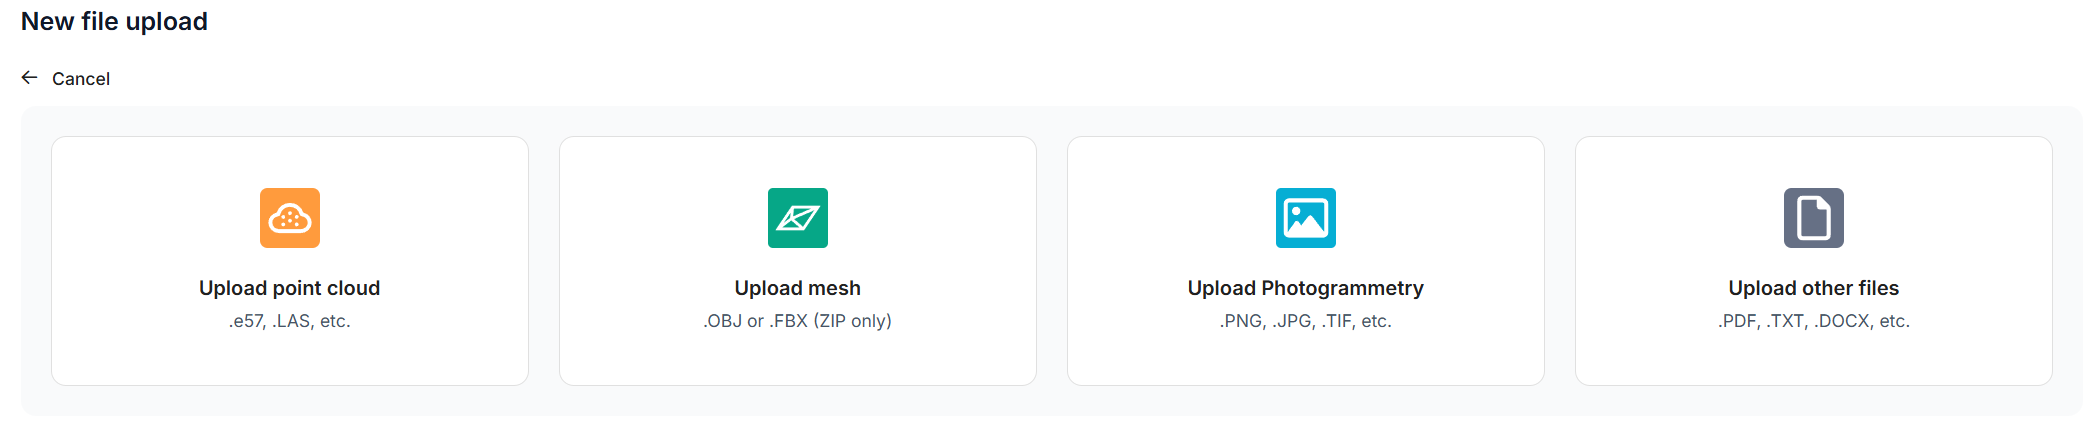
Follow the Upload Workflow. Choose the path that matches how your data was captured (point cloud, mesh, photogrammetry, or other files) and check supported formats for that type before uploading.
Why this matters: Uploading through the right path the first time prevents validation and processing errors. A clean upload sets up processing, where you generate the representations you’ll actually use.
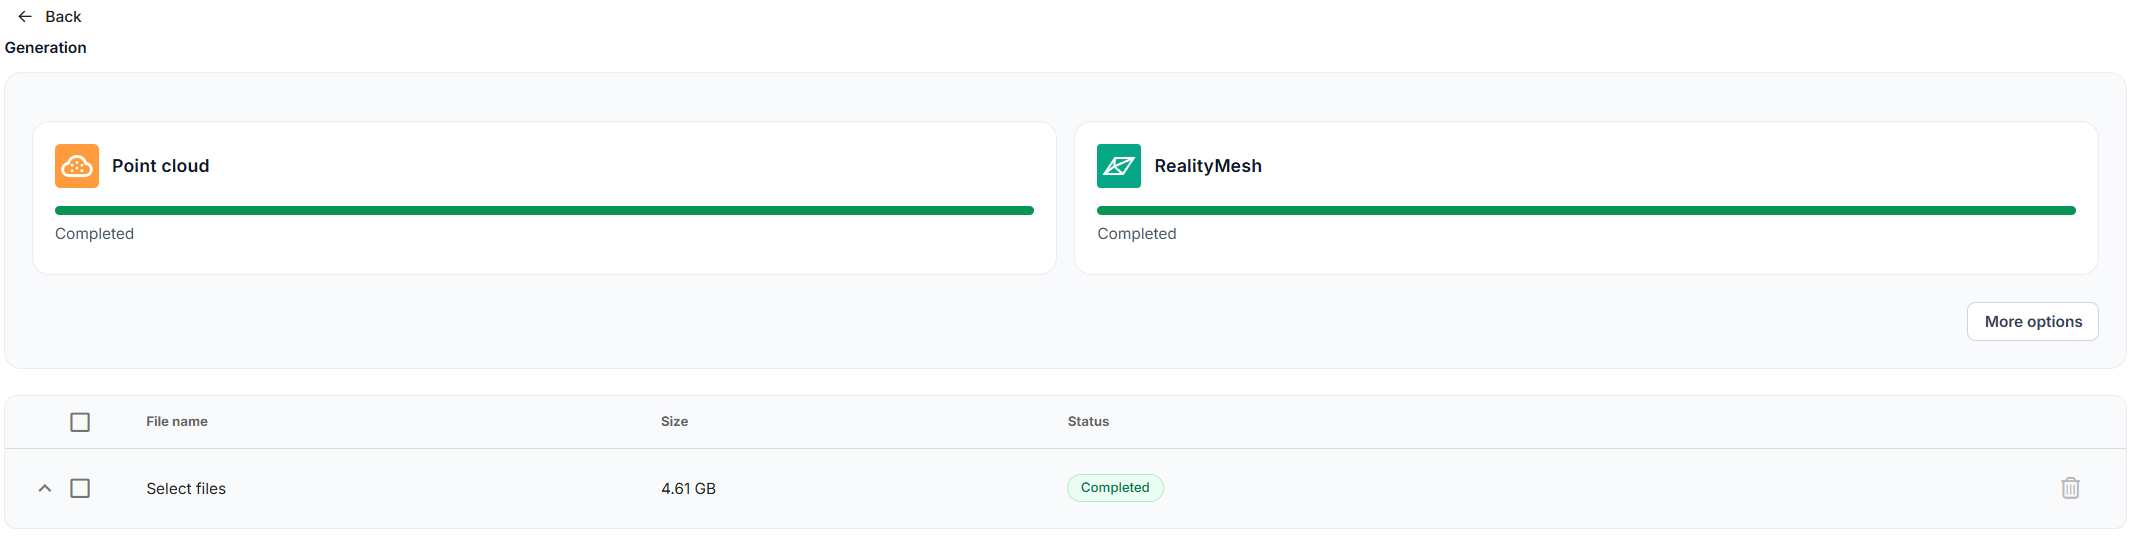
Generate the visual representations you need: point cloud, mesh, photosphere, plus exports such as 3D Tiles or RCP. Processing is required before data can be viewed; you can run it in phases to validate quality first.
Why this matters: Processing turns raw uploads into optimized, streamable representations for the 3D Data Viewer, RealityTwin, RealityPlan, and RealityConnect. Process in phases to create exactly what your workflow needs.
Switch between point cloud, mesh, and photosphere representations — or show several at once. Move through the scene with 360° photosphere and free-fly perspective navigation; take measurements in the browser.
Why this matters: The viewer is where you validate data. A clean render confirms upload and processing worked and lets you check quality, coverage, and alignment before anyone builds on it. Catching a gap or misalignment now is far cheaper than finding it later in a design or a twin.
By product · Steps 12–15 · Choose the paths that match the products in your plan.
Set up Asset Types, organize datasets into site folders, and use Sharing to generate secure, time-limited links for internal and external stakeholders. Add notes, documents, and comments for feedback.
Why this matters: This turns scans into a living source of truth — stakeholders work from the same up-to-date record instead of scattered files and outdated copies.
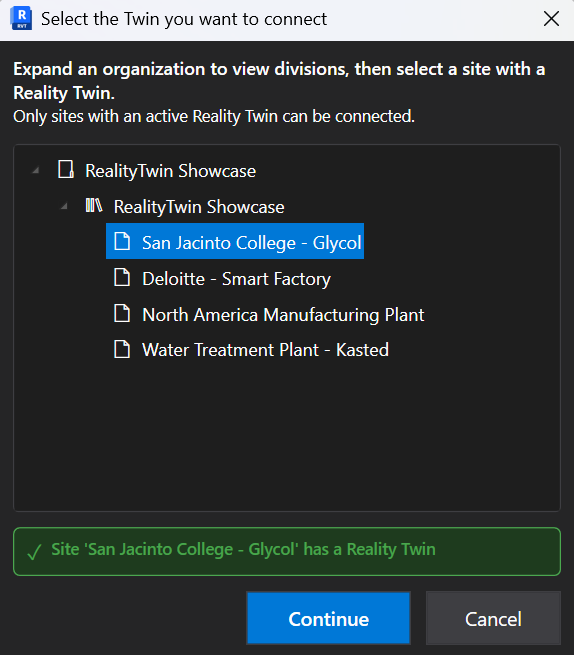
Start with What is RealityTwin?, then follow Creating a Twin. Learn the Twin Workspace for navigation, measuring, RealityAssets, Points of Interest, and Zones; connect enterprise systems (ERP, MES, CMMS, IIoT).
Why this matters: A digital twin gives operations and maintenance teams a persistent, up-to-date view of facilities — cutting field time and inspection costs while improving planning and safety.
Read What is RealityPlan?, install the application, and work through First Steps. Explore tools like Measure, Annotation, Import 2D/3D, Clash Detection, and Visual Compare. Note: review Mac support if applicable.
Why this matters: RealityPlan combines reality capture with CAD/BIM to plan layouts, simulate changes, and detect clashes — turning data into engineering decisions.
Read What is RealityConnect? and install plugin(s) for your software: Autodesk (Revit, AutoCAD Plant 3D, Inventor), Siemens (NX, Process Simulate), Bentley MicroStation, or NVIDIA Omniverse.
Why this matters: RealityConnect brings Prevu3D data directly into the design tools your engineers already use — real-world context without leaving their familiar environment.
Steps 16–17 · Ongoing
Bookmark the Prevu3D Knowledge Base and explore documentation, guides, and FAQs. Watch product demo videos and the Prevu3D YouTube channel to see workflows in action.
Why this matters: The Knowledge Base is your go-to for quick answers and deep reference — videos are the fastest way to get oriented.
Check the Release Notes for new features and improvements, and the System Status page for service updates.
Why this matters: Staying current means you benefit from the latest features and fixes, and you’ll know right away if a service issue affects your work.
We’re here to support you.
Reach the Prevu3D team through the Support page or support@prevu3d.com.
Real-time uptime on the Status page.
Certifications and compliance on the Security page.
Contact us — tell us about your needs.
Suggest and vote on features in the Prevu3D Ideas Portal.