
Avatar
Avatars bring your 3D environment to life, allowing you to represent yourself while exploring and collaborating in immersive environments across RealityTwin and RealityPlan.
Your avatar is associated with your user profile and can be used across supported Prevu3D products.
Creating avatars
Section titled “Creating avatars”To create an avatar, go to Settings > Avatar. There are two ways to get an avatar, and either one can then carry your custom branding:
-
Predefined avatar — the quick path. Pick a ready-to-use avatar; no preparation required. Best for most users.
-
Custom avatar (GLB) — the advanced path. Import a model you built in 3D software. It gives you full control over how the avatar looks, but the model must meet the technical requirements below.
Choose a predefined avatar
Section titled “Choose a predefined avatar”Choose from a curated list of ready-to-use avatars available in the system. This is the fastest option — no modeling or rigging required.
Import a custom avatar (GLB)
Section titled “Import a custom avatar (GLB)”Custom avatars are self-service: prepare your model in your own 3D software, export it to GLB, and upload it from Settings > Avatar. This lets teams add avatars that reflect their own environment — for example operators, technicians, maintenance workers, or plant-floor personnel.
To display and animate correctly, a custom avatar must meet these technical requirements:
-
GLB format — the avatar is uploaded as a single
.glbfile. -
Standard humanoid rig — the mesh must be skinned to a standard humanoid skeleton that follows the Mixamo rig (also compatible with Unity’s humanoid rig), using the expected bone names such as
Hips. This shared skeleton is what lets Prevu3D animate your avatar — walking, idle, and third-person movement. -
Embedded textures — export with the textures embedded inside the GLB, so colors and logos travel with the single file.
-
Compatible mesh and materials — meshes and materials must export cleanly to GLB.
Before you upload
Section titled “Before you upload”-
The file is a single GLB.
-
The character is humanoid and rigged with a standard skeleton.
-
It stands upright, at roughly human height, facing forward.
-
Meshes, materials, and any logo look correct in a GLB preview.
-
Textures are embedded in the file.
-
The file size is reasonable for the web — smaller is better.
-
You have the rights to every model, texture, and logo you used.
Add custom branding (optional)
Section titled “Add custom branding (optional)”You can personalize your avatar by adding:
-
A logo on the front
-
A logo on the back
This allows teams to represent company branding inside collaborative 3D environments.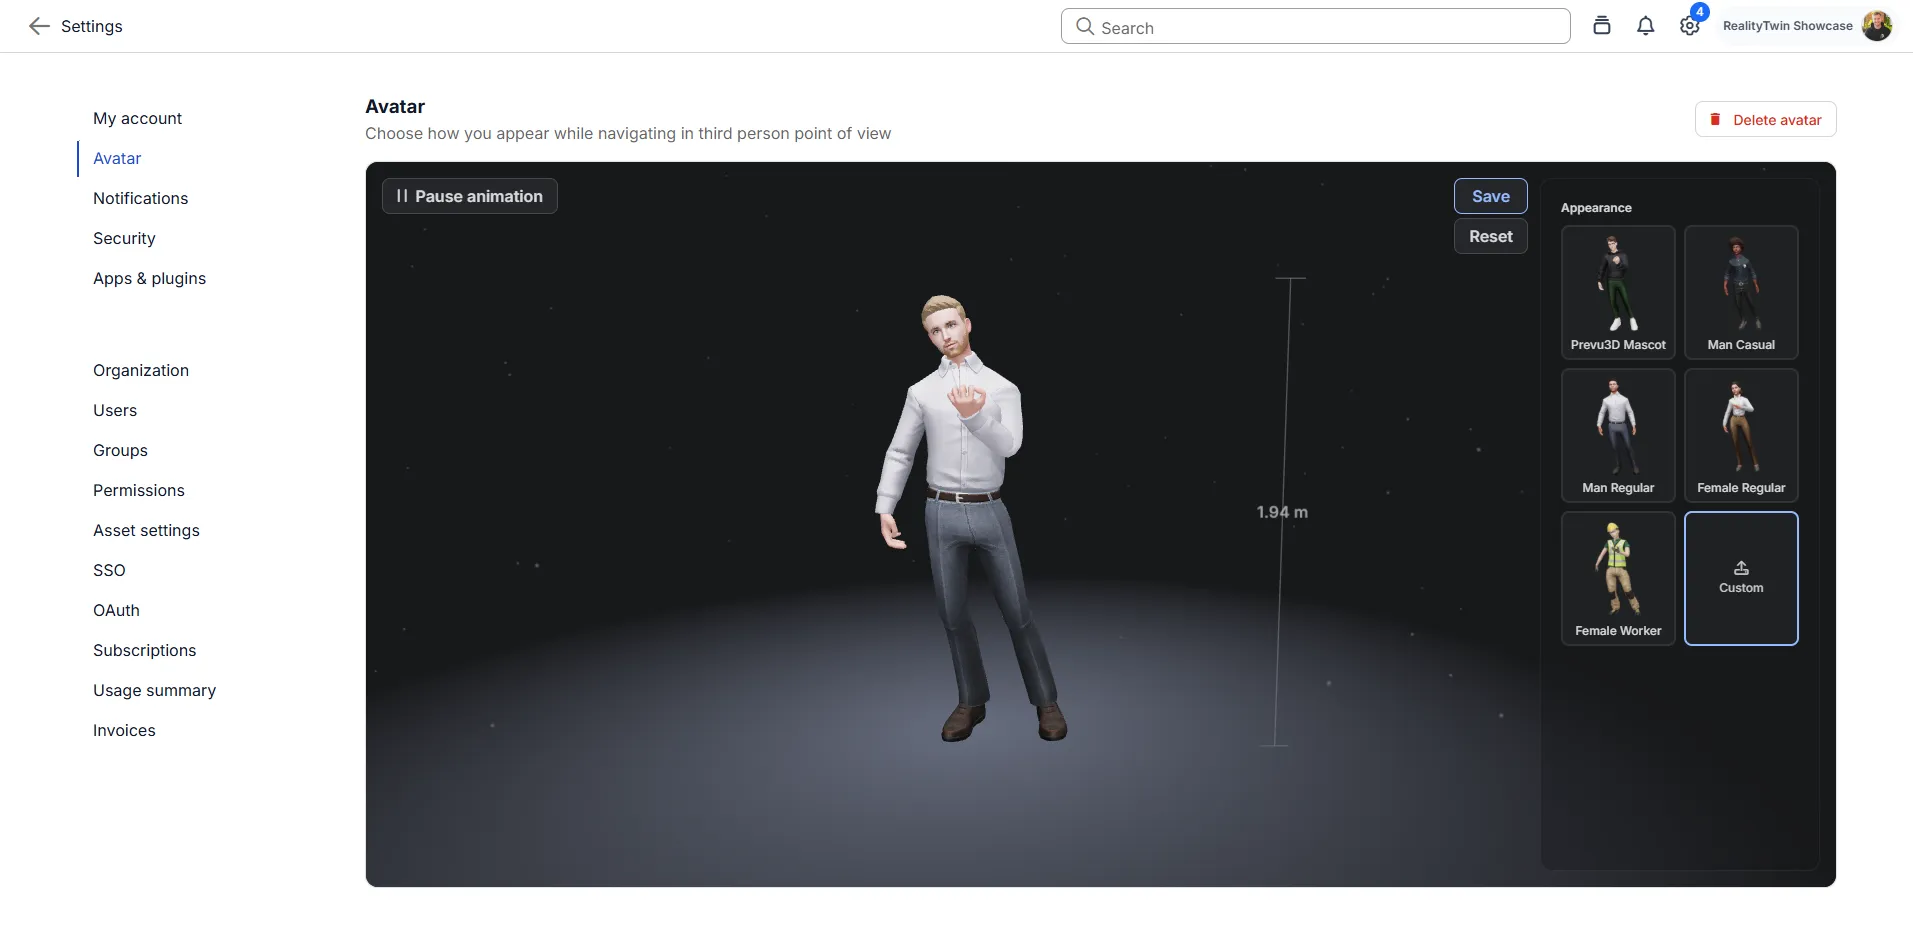
Changing or removing your avatar
Section titled “Changing or removing your avatar”To swap your avatar, return to Settings > Avatar, pick a different predefined avatar or upload a new custom GLB, preview it, and save — the new choice replaces the previous one. The same screen is where you remove a custom avatar to go back to a predefined one.
RealityPlan Desktop manages avatars separately; see Avatar Behavior by Platform below.
Troubleshooting
Section titled “Troubleshooting”Use the preview area as your checkpoint before saving:
-
Avatar looks gray or untextured — the textures were not embedded in the GLB. Re-export with embedded textures and upload again.
-
A logo is missing — the textures were not embedded, or the logo sits on a hidden part of the mesh. Re-check placement and re-export.
-
Avatar is tiny, huge, lying down, or facing away — a scale or orientation issue in the source model. Set it upright, at roughly human height, facing forward, then re-export.
-
The upload is rejected or the avatar does not move — usually a rigging or skeleton problem. Confirm the model is a rigged, standard humanoid.
Avatar Behavior by Platform
Section titled “Avatar Behavior by Platform”Web (RealityTwin & RealityPlan Web)
Section titled “Web (RealityTwin & RealityPlan Web)”Once configured, your avatar will automatically appear in supported environments.
RealityPlan Desktop
Section titled “RealityPlan Desktop”RealityPlan Desktop includes its own predefined avatar set.
If you want to use your selected web avatar in the Desktop application, additional configuration steps are required.
Please refer to the dedicated article: Using Your Web Avatar in RealityPlan Desktop
Navigation and Third-Person Mode
Section titled “Navigation and Third-Person Mode”Navigation and Third-Person mode behavior are covered in a separate article.
Refer to: