
CAD Inspection
CAD inspection opens the element hierarchy of a CAD model loaded in a space, so you can find a part, see where it sits in 3D, and read the properties it carries from its source file. From the same hierarchy, you can turn CAD elements into RealityAssets in a few clicks.
Add your CAD model to the Twin
Section titled “Add your CAD model to the Twin”CAD inspection works on the CAD models that are part of the Twin. Start by adding your CAD model as a layer in RealityComposer: CAD layers are added as floating layers, which render on their own, independently of the scans. See Adding a New Layer.
Open CAD inspection
Section titled “Open CAD inspection”-
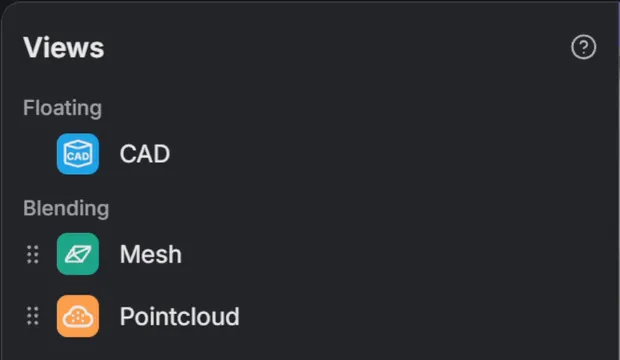
In the Views block at the top of the left panel, find CAD under Floating, and click it.
-
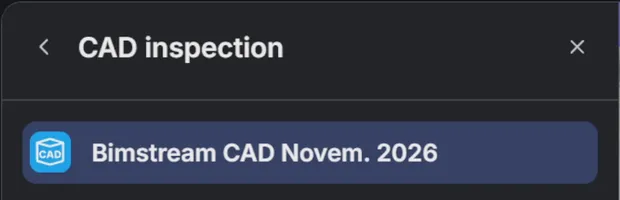
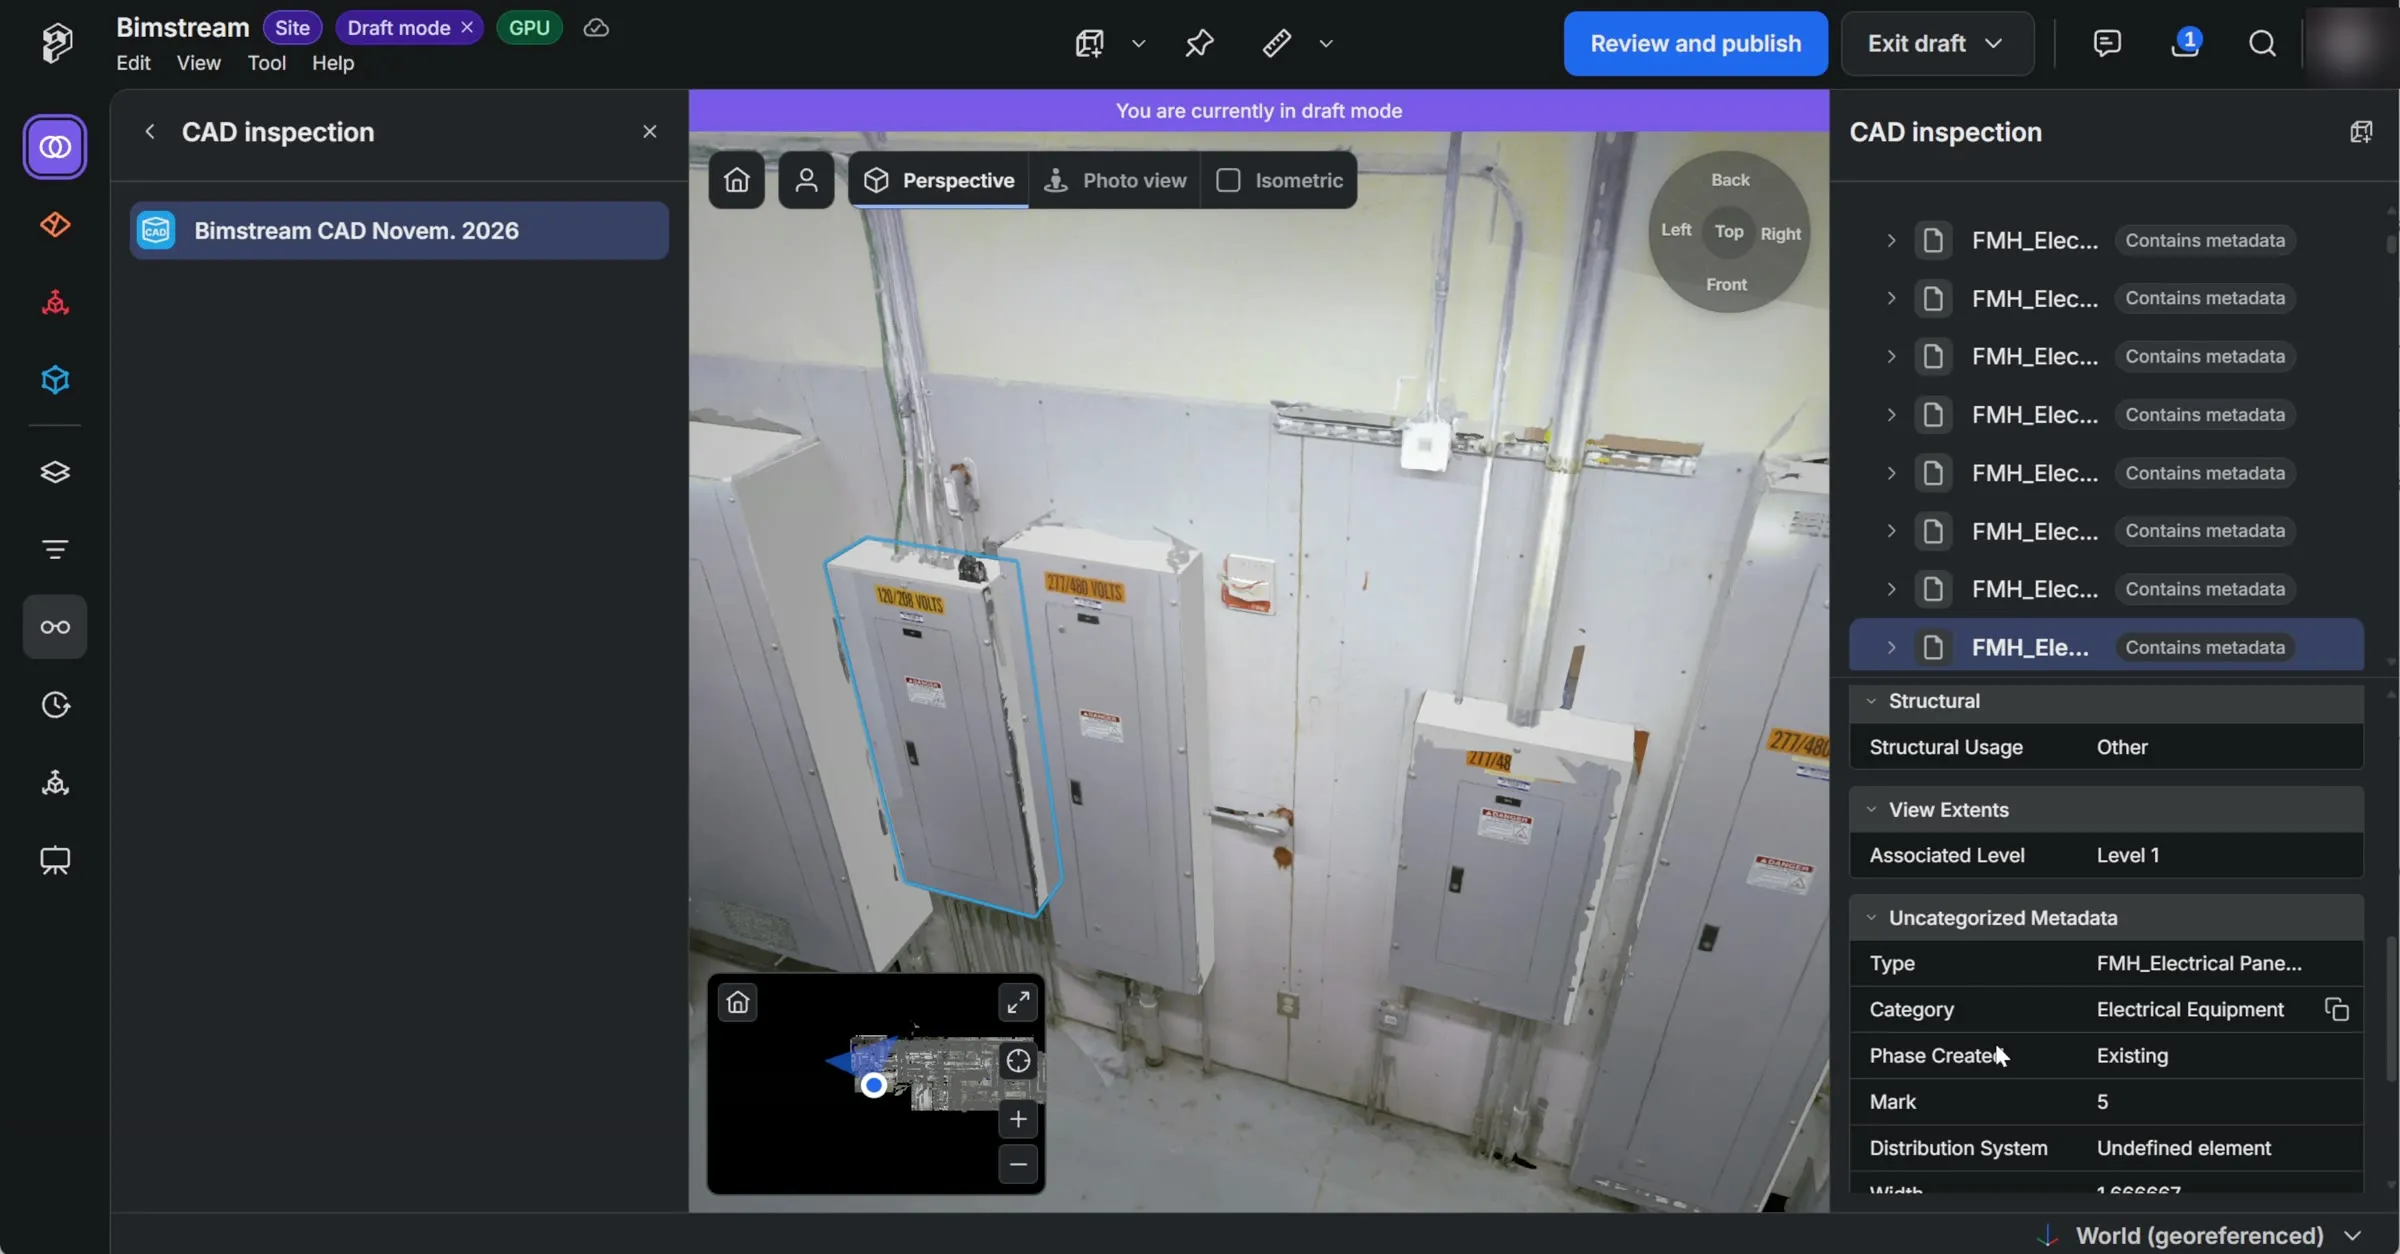
The left panel lists all the CAD models in the current scene. Select one to inspect it in depth: the CAD inspection panel opens on the right, with the element hierarchy of that model at the top and the properties of the selected element below. Drag the divider between them to give either part more room.
One CAD model is inspected at a time. To leave CAD inspection, click the back arrow in the left panel, select another view, or start any tool.
Explore the CAD hierarchy
Section titled “Explore the CAD hierarchy”The hierarchy follows the structure of the CAD model, from its top-level assemblies down to individual parts.
-
Counts — an assembly shows how many parts it contains, for example Pump (12).
-
Contains metadata — this chip marks elements that carry CAD properties.
-
Hover an element in the list to highlight it in 3D, or hover a part in 3D to highlight its row.
-
Click an element to select it. Selecting an assembly selects all of its parts. Clicking a part in 3D selects it too, and the hierarchy expands and scrolls to its row.
-
Double-click an element to move the camera to it.
While CAD inspection is open, the edges of the CAD model are outlined so parts are easier to tell apart.
Read an element’s properties
Section titled “Read an element’s properties”Select an element to show its properties under the hierarchy, grouped in collapsible categories. Properties without a category are listed under General.
-
Values that are web addresses open in a new tab when clicked.
-
Hover a property and click Copy value to copy it to the clipboard.
Inspect a placed CAD model
Section titled “Inspect a placed CAD model”A CAD model can also be placed in the space as a 3D model instead of being added as a layer, for example a CAD model from the Asset Library or one that is part of an imported layout. To inspect it, select it and open the BIM inspection tab in its panel. The tab holds the same hierarchy and properties, limited to that model.
Show CAD lines
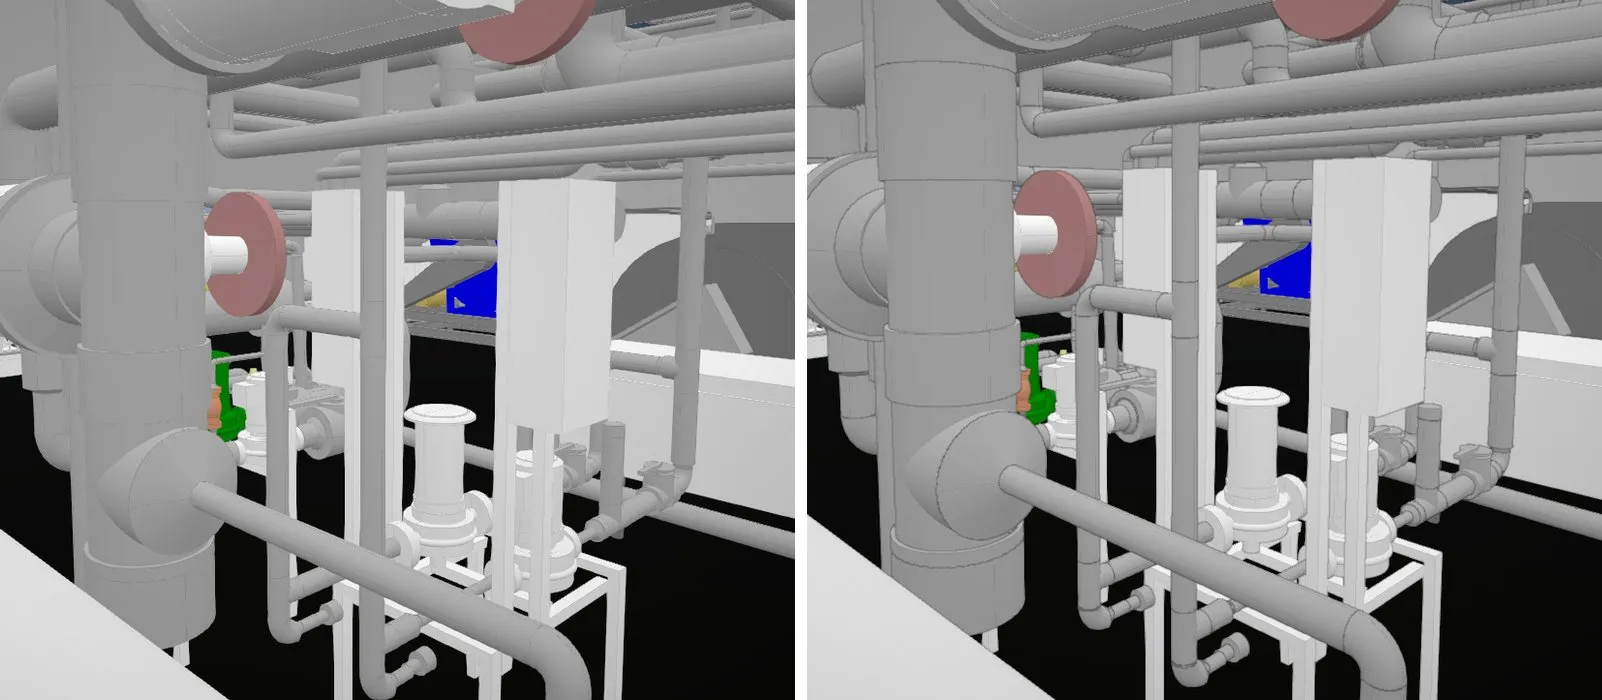
Section titled “Show CAD lines”To keep the edges of CAD models outlined at all times, not only during CAD inspection, open the View menu and turn on Show CAD lines. The images below show the same view with Show CAD lines off (left) and on (right).
Create RealityAssets from CAD elements
Section titled “Create RealityAssets from CAD elements”Prevu3D can create RealityAssets based on the structure of your CAD model. From the CAD inspection panel, you choose which CAD elements to convert, and each one becomes a RealityAsset named after the element and sized to its 3D bounds. You can create them one at a time, or many at once from a search, and copy CAD properties into the fields of their metadata type as they are created.
Before you start
Section titled “Before you start”-
Creating RealityAssets from CAD is in Beta — available on demand. Contact your Prevu3D representative if it is not yet enabled for your organization.
-
Enter draft mode first, or work in a RealityPlan Project. RealityAssets created in a draft reach the published Twin when you publish the draft.
-
You need permission to create RealityAssets — see Roles & Permissions.
When any of these is missing, the creation options do not appear in the panel.
Create one RealityAsset
Section titled “Create one RealityAsset”Right-click an element in the hierarchy and select Create a RealityAsset. The Create RealityAssets window opens with that element, ready to create.
Create RealityAssets from a search
Section titled “Create RealityAssets from a search”-
In the header of the CAD inspection panel, click Create RealityAssets from CAD elements.
-
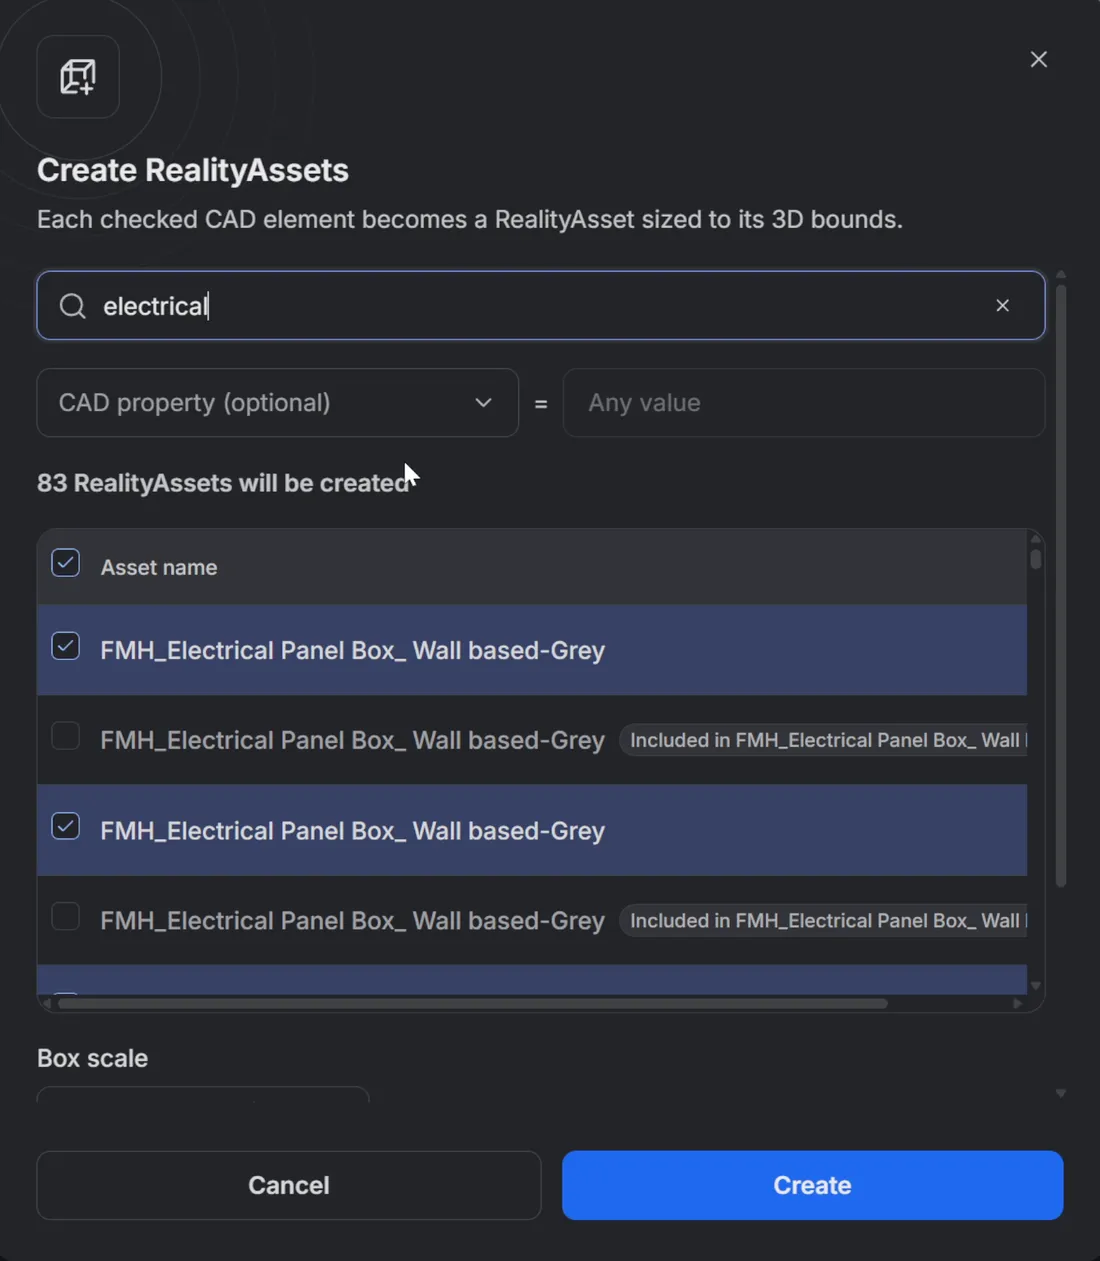
In the Create RealityAssets window, search the inspected source:
-
Search CAD elements by name — finds elements whose name contains the text, ignoring case.
-
CAD property (optional) — finds elements that have this property. Type a value next to it to keep only the elements where the property equals that value, ignoring case.
When you fill in both, elements must match both.
-
-
Every matching element is listed under Asset name and checked. Uncheck the ones you don’t want.
The window counts how many RealityAssets will be created as you check and uncheck elements.
Set the boxes and the metadata
Section titled “Set the boxes and the metadata”-
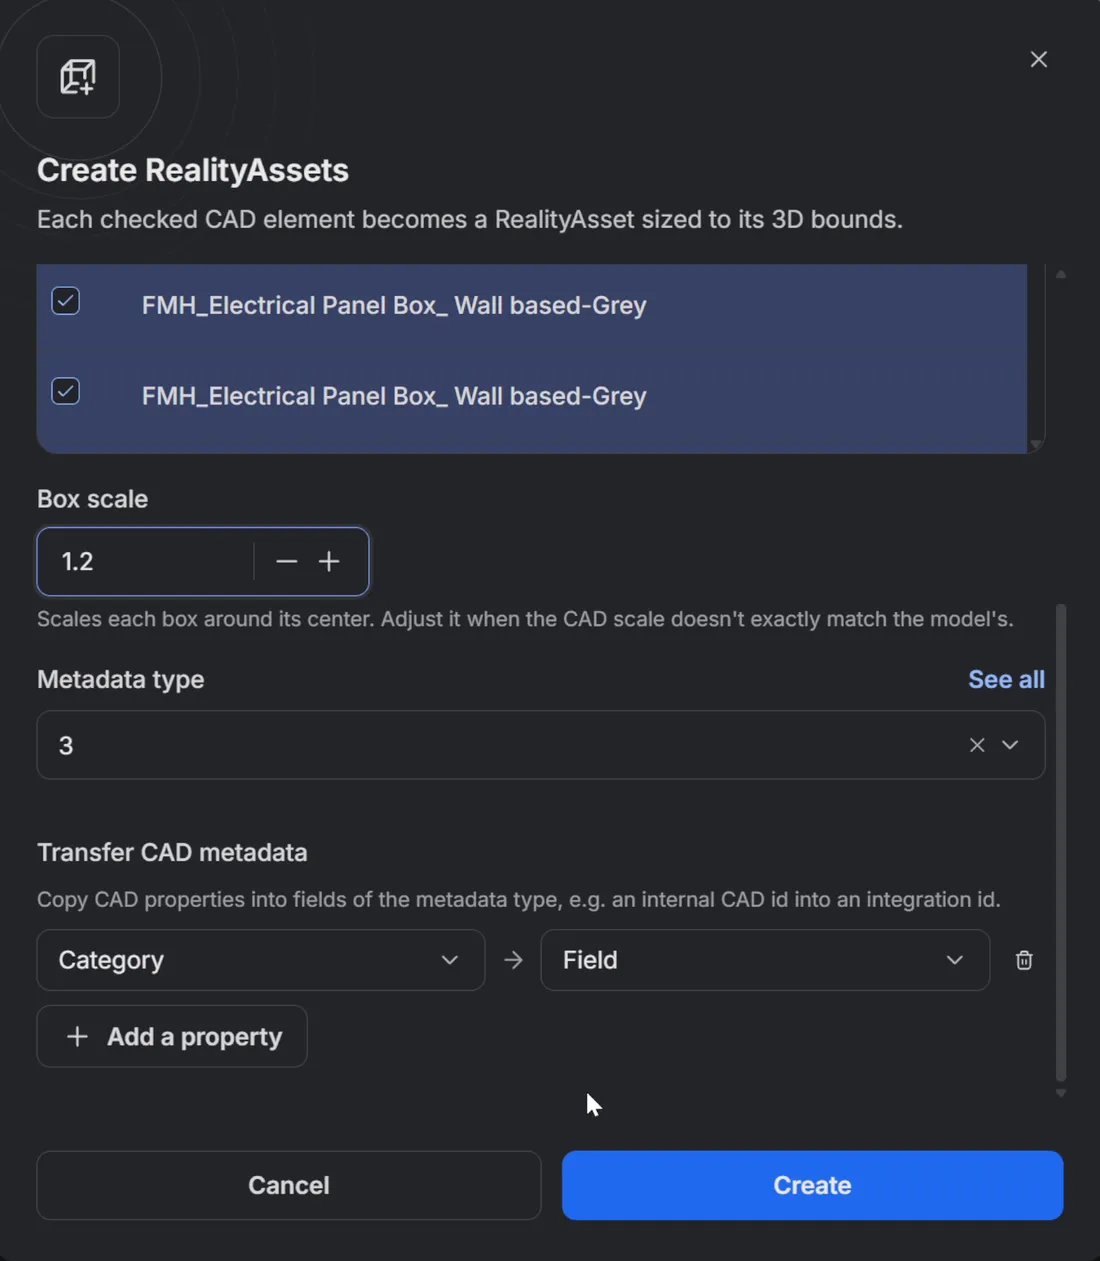
Box scale — enlarges or shrinks each box around its center, from 0.5 to 1.5. Leave it at 1 unless the scale of the CAD model does not exactly match the rest of the space.
-
Metadata type — the metadata type given to every RealityAsset created in this run, or No type.
-
Transfer CAD metadata — once a metadata type is picked, click Add a property and pair a CAD property with a Metadata type field. Add one row per property to copy. Only text and number fields can receive CAD values.
Create the RealityAssets
Section titled “Create the RealityAssets”-
Click Create, then confirm.
-
The RealityAssets are created one by one, with a progress bar.
-
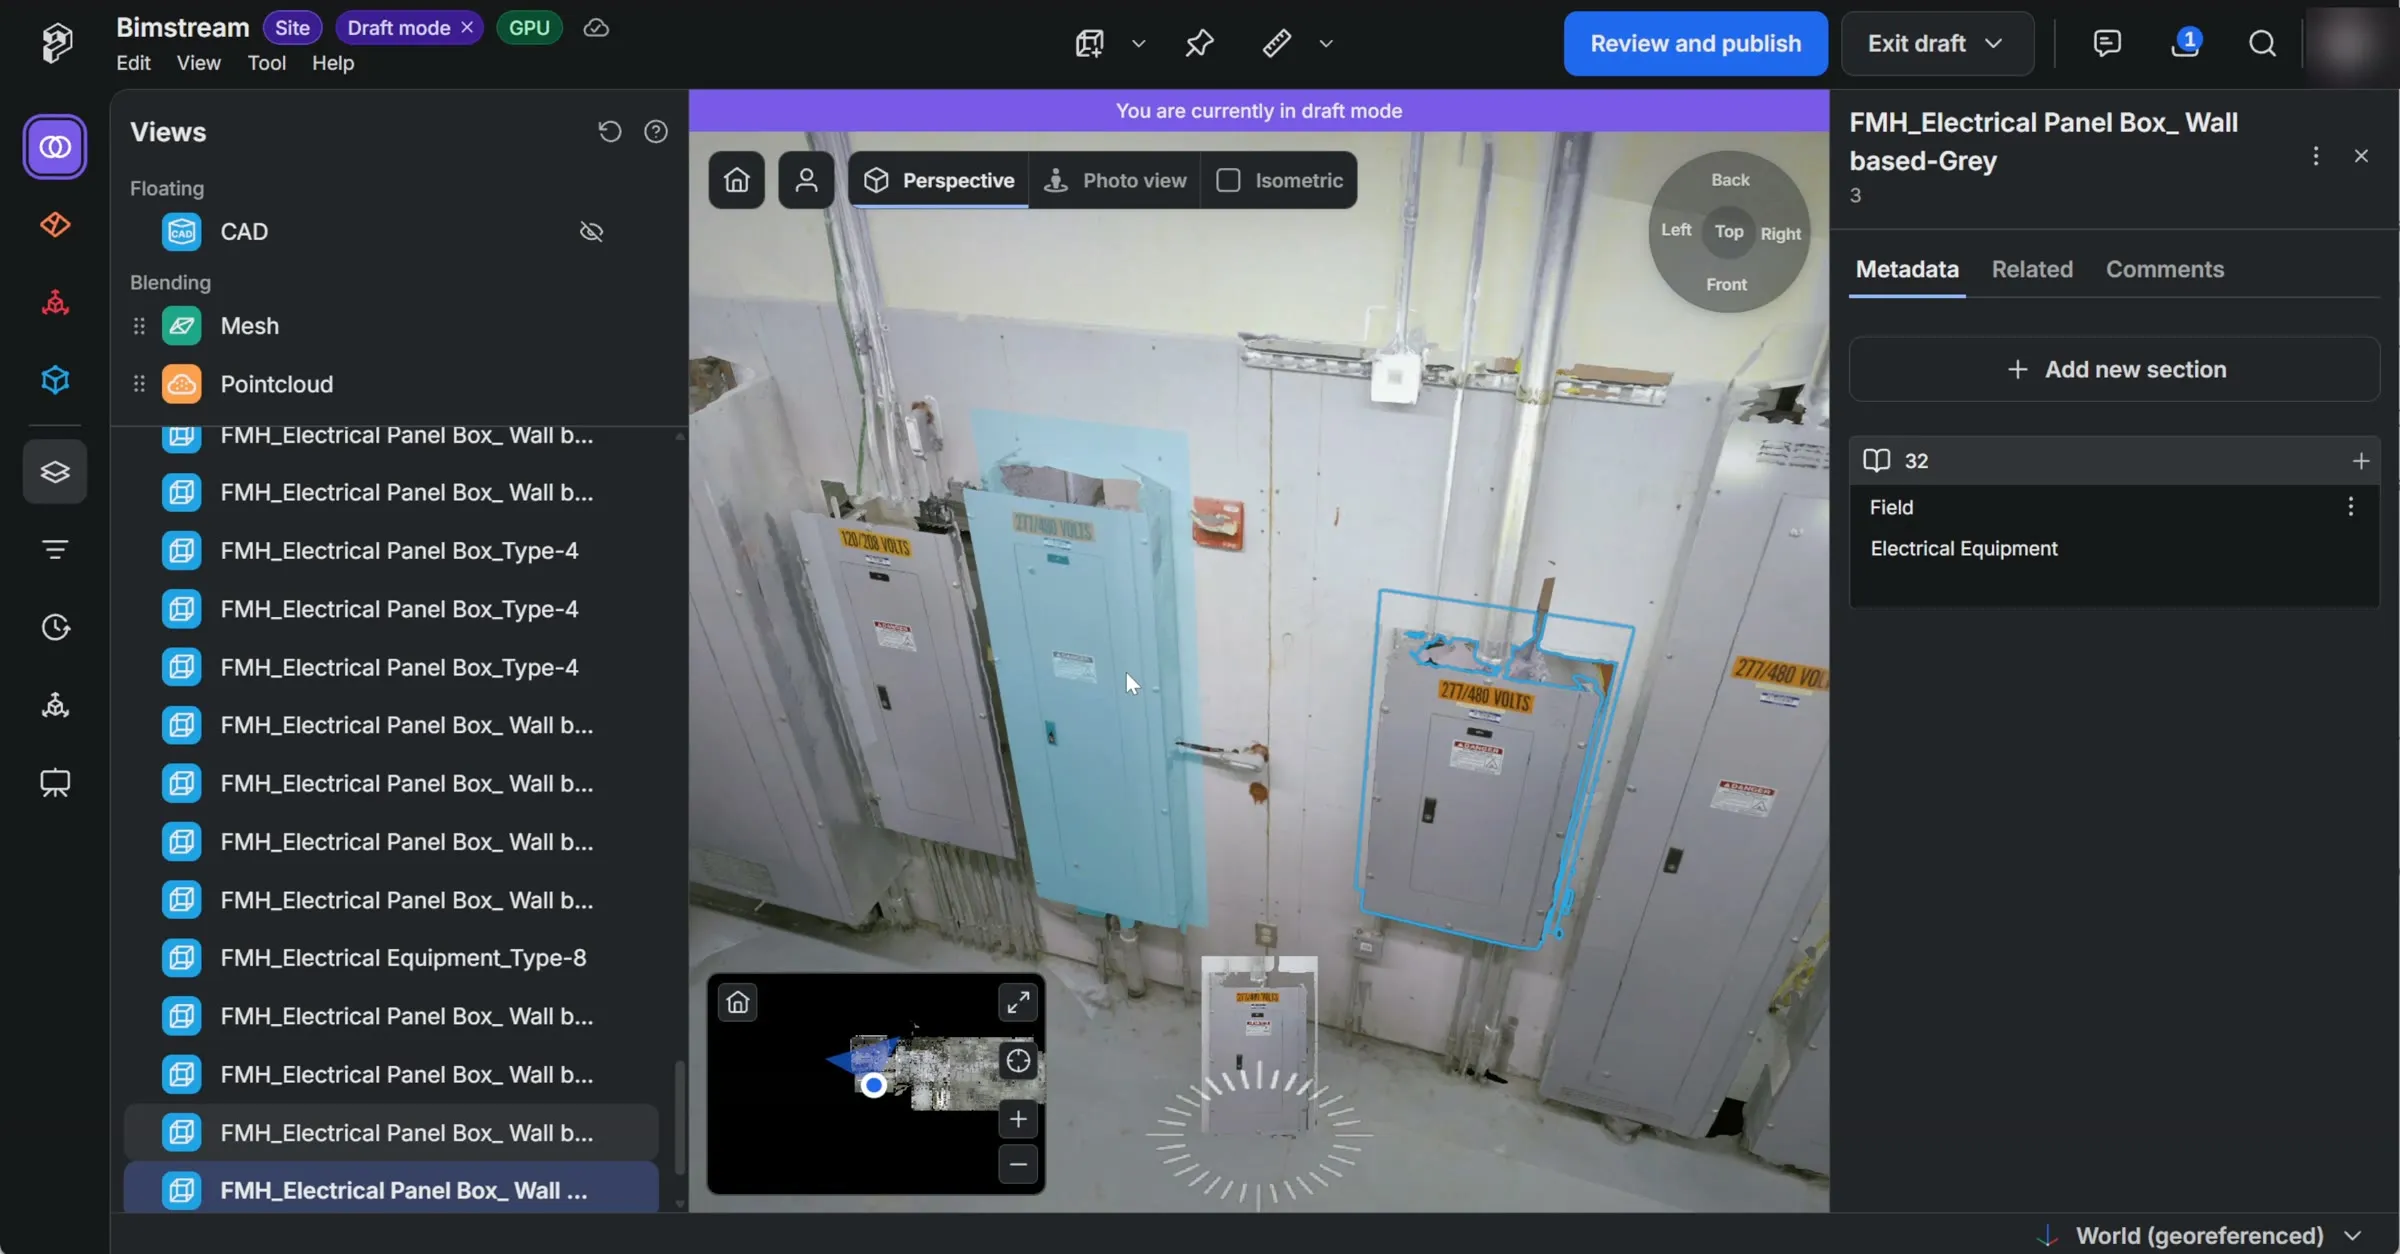
When the run ends, a summary shows how many RealityAssets were Created, how many elements were skipped as Without 3D, and how many could not be created. Click Close.

Good to know
Section titled “Good to know”-
Several boxes per RealityAsset. A RealityAsset made from an assembly holds one box per part, and each box follows the part’s orientation.
-
Names come from the CAD. Rename a RealityAsset afterwards from its panel if needed.
-
Elements without geometry are skipped and counted as Without 3D.
-
CAD values that don’t fit are left out. A field stays empty when the element doesn’t have the CAD property, and a number field stays empty when the CAD value is not a number.
-
Each RealityAsset is its own undo step. Undoing a run of 50 RealityAssets takes 50 undos.
-
Running the same search twice creates the RealityAssets twice. Existing RealityAssets are not checked, so review the space before running a search again.
To refine the boxes of a created RealityAsset, or add more information to it, see Working with RealityAssets and Adding & Editing Metadata.