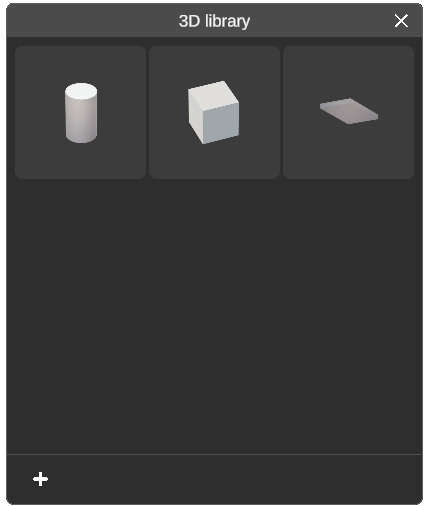
Basic 3D Shapes
The 3D library allows you to draw 2D and 3D shapes in your space. It can be useful for validating clearances or filling in a blank space.
Drawing a basic shape
Section titled “Drawing a basic shape”RealityPlan offers three basic shapes: cylinder, cube, and plane. To place a shape:
-
Open the 3D library from the toolbar.
-
Select the shape you want to place.
-
For cylinders or cubes, click the environment to insert the shape.
-
For planes, click the environment multiple times to draw the shape’s outline. Click the first point a second time or press
Enterto complete the outline definition.
-
-
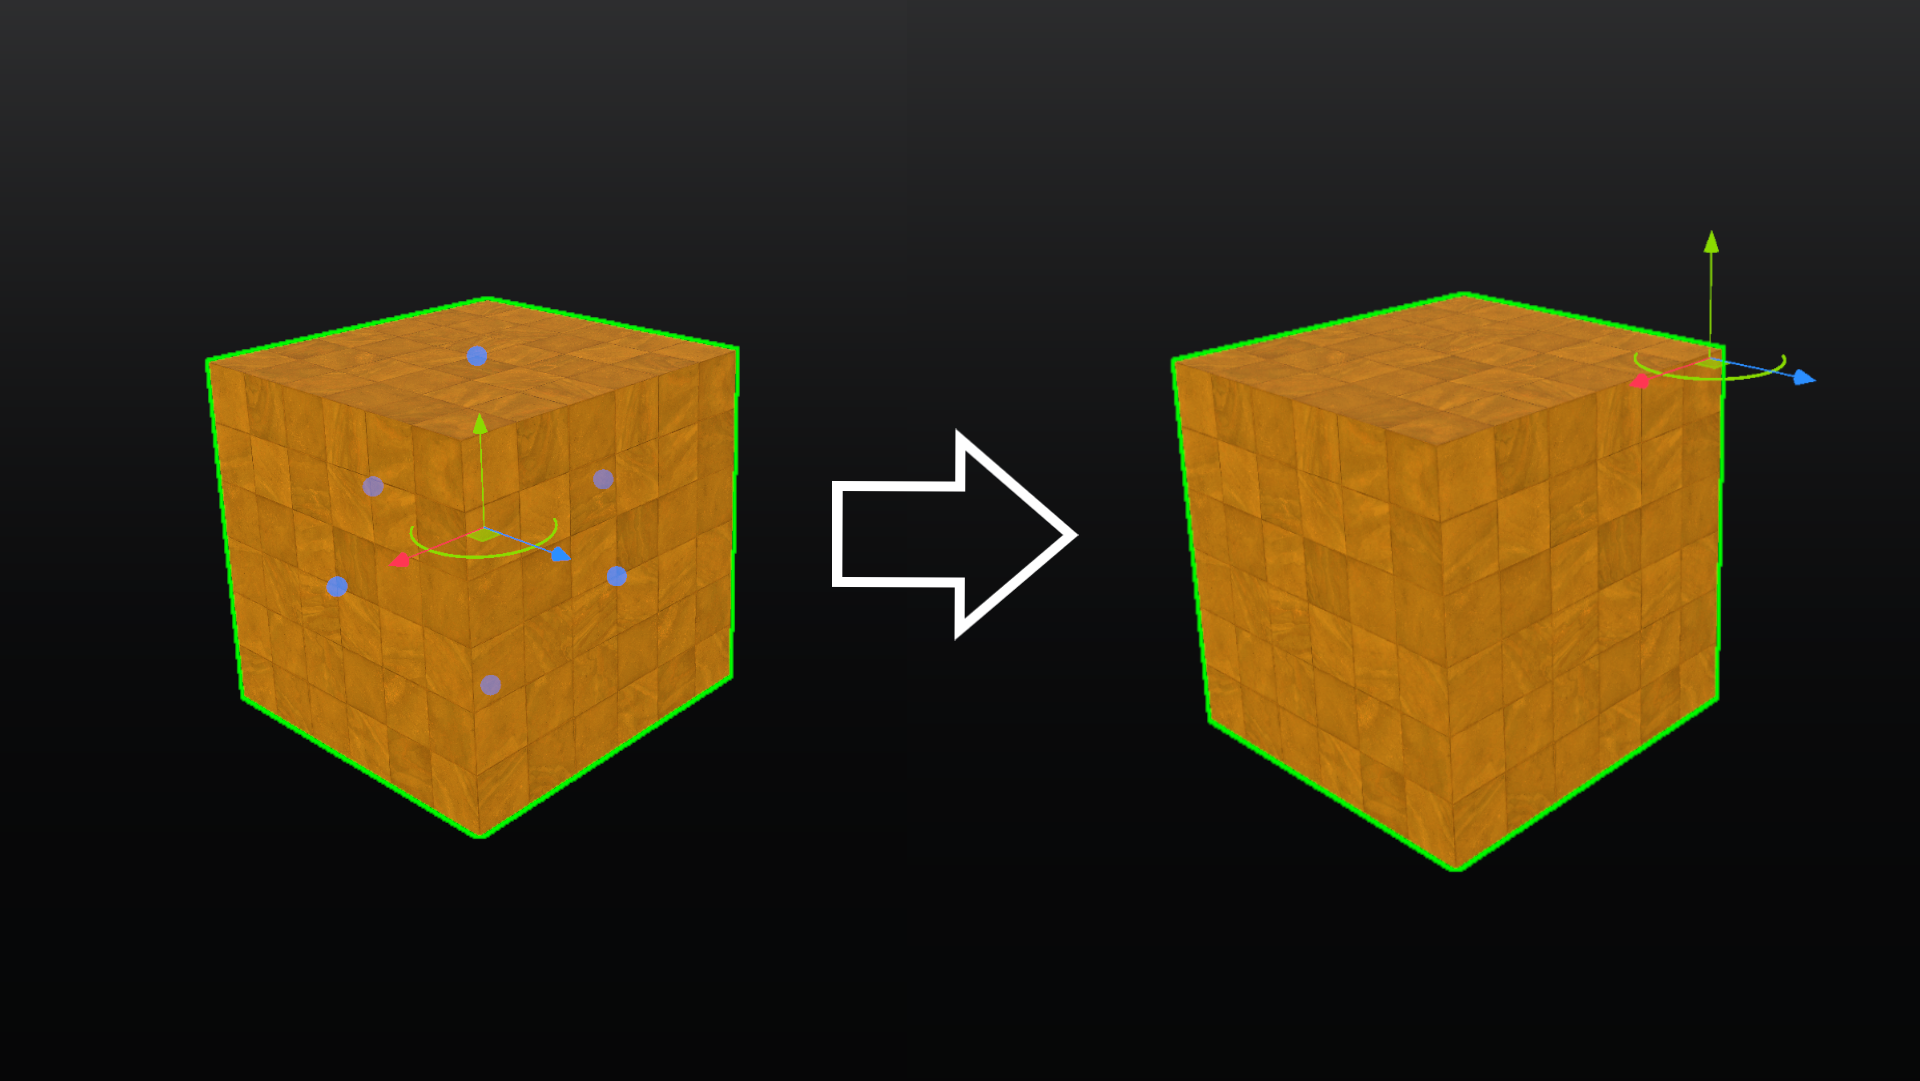
You may adjust the size and position of the shape with the handles surrounding it. You can also show additional handles by pressing
Ron your keyboard.
Coloring and texturing
Section titled “Coloring and texturing”You can easily texture and color the faces of the shapes using the shape’s Settings panel:
-
Click the texture box to open the texture library, and apply a texture to the shape. You may import external textures using the import material button. The textures also support video playback.
- Supported file extensions: png, jpg, jpeg, and mp4.
-
Click the stretch texture button next to the texture box to repeat or extend the texture on the shape.
-
Click the Select color box to change the shape’s color. You can then choose a custom color or pick one directly from the environment.
-
Set simple Physically Based Rendering materials (e.g., glass, mirror, steel) by using the Material presets.
-
Set advanced PBR properties by adjusting the transparency, smoothness, and metallic sliders

Face-Specific Texturing (Cube Primitive)
Section titled “Face-Specific Texturing (Cube Primitive)”Use the Modify textures on individual sides button to apply different textures to each face of the cube primitive. This allows for more precise visual representation—such as showing a reference image (e.g., shelving) on one side—while keeping the remaining faces neutral or have it’s own texture.

Basic Positioning
Section titled “Basic Positioning”For quick positioning, you can set the pivot point directly from the shape’s Settings panel. When an object is selected, the Pivot Mode setting allows you to choose between:
-
Center : Places the pivot at the geometric center of the object.
-
Base : Positions the pivot at the lowest point of the object’s bounding box, ideal for floor alignment or stacking.
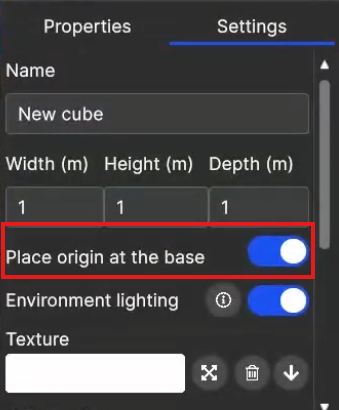
This option is especially useful for fast and consistent object placement without manually adjusting the pivot in the scene.
Advanced Positioning: Change pivot point
Section titled “Advanced Positioning: Change pivot point”This tool enables you to temporarily change the pivot of an object, placing it anywhere on the scene. This allows for more precise movement, especially for large assets.
To use this feature:
-
Select the object
-
Select the Change pivot option from the contextual menu using the mouse
right-click.Clickany point in the environment to relocate the pivot to the desired position.
Advanced Positioning: Use offset placement
Section titled “Advanced Positioning: Use offset placement”This tool lets you move a shape by manually entering offset distances for translation and rotation angles.
To use this feature:
-
Select the object
-
Select the Use offset placement option from the contextual menu using the mouse
right-click. Enter values for translation and rotation along axes X, Y and Z, then click Apply.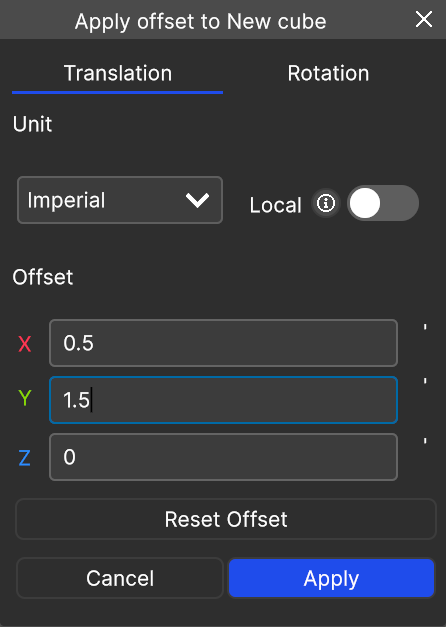
Exporting
Section titled “Exporting”Similarly to 3D models, the 3D shapes can be exported.