
User Guide
RealityConnect for Omniverse bridges the gap between high-fidelity digital twins and your Omniverse stage. It streams large-scale RealityTwin environments and individual Reality Assets directly into Omniverse — entirely in memory, with progressive view-dependent refinement, so there is no need to download or import files to disk.
Opening the plugin
Section titled “Opening the plugin”Once the extension is installed and loaded, RealityConnect adds a button to the main toolbar of your Omniverse application.

-
Click the Open Prevu3D RealityConnect button on the toolbar to open the panel.
-
Click it again at any time to hide or re-show the panel.
The Sites, Assets, Settings, and About tabs become available after you sign in.
Accessing your data
Section titled “Accessing your data”Signing in
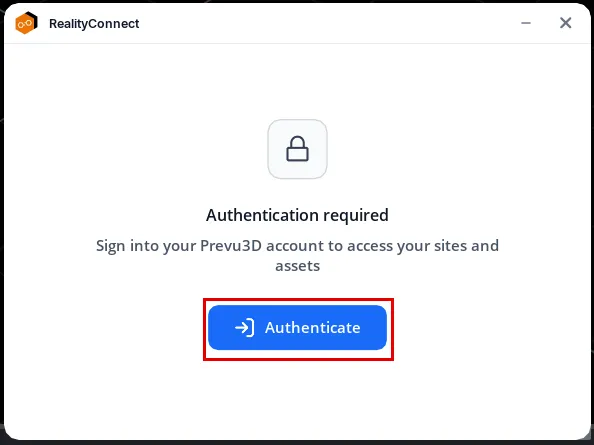
Section titled “Signing in”To access your data, you must first sign in to your Prevu3D account.
-
In the RealityConnect panel, click Connect to RealityPlatform. A web browser opens and redirects you to the Prevu3D sign-in page. The panel shows Waiting for authentication in the meantime.
-
In the web browser, sign in to your Prevu3D account and authorize the plugin to access your organization’s data.
-
Back in Omniverse, the panel shows Loading your sites… and then opens the Sites tab.
Browsing your sites
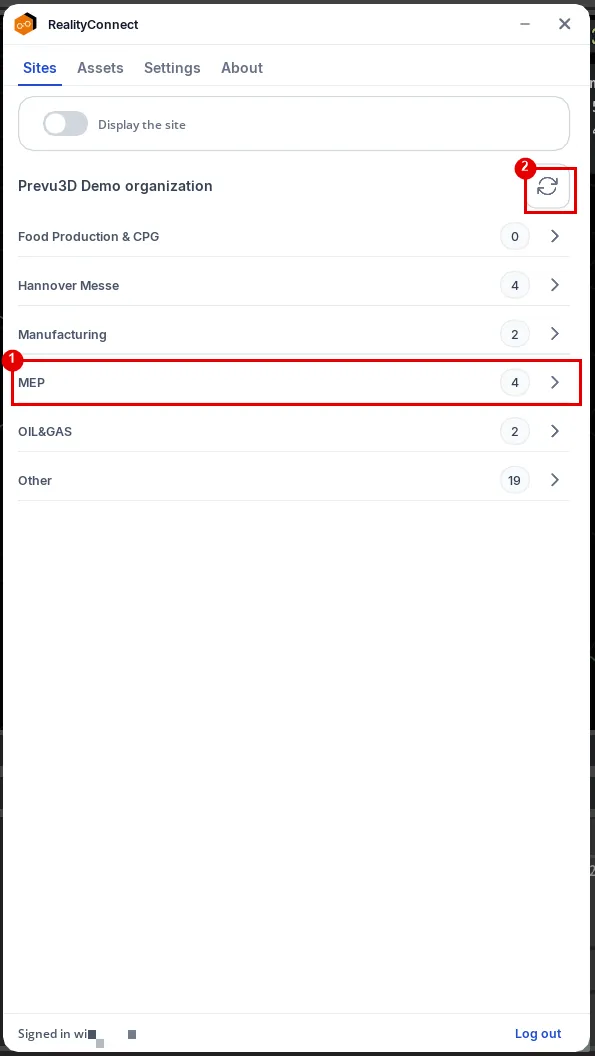
Section titled “Browsing your sites”Once signed in, the Sites tab lists the data you have access to, grouped under your organization.
-
Divisions — each division row shows how many sites it contains. Click a row to expand or collapse it and reveal its Sites and the RealityTwins within them.
-
Refresh — reload the list from RealityPlatform at any time.
Connecting to a twin
Section titled “Connecting to a twin”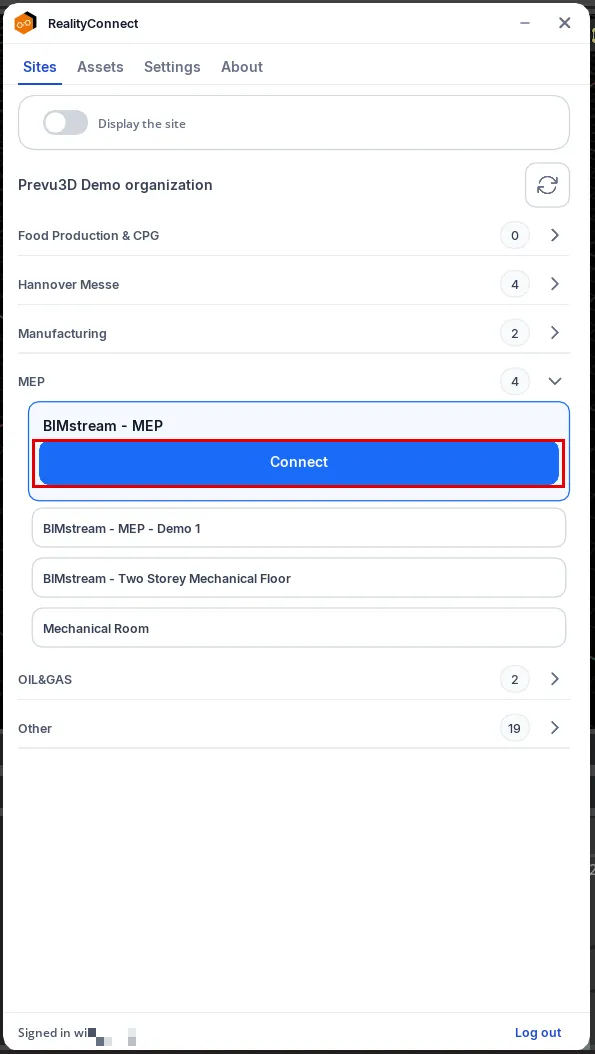
-
Click a RealityTwin to select it. The row expands into a card with a Connect button.
-
Click Connect. The row shows Status: connecting… while the session is established, then Status: Connected once the environment begins streaming into your stage.
-
As you move the camera, the environment streams in progressively.
To stop streaming, click Disconnect on the connected row. If a connection fails, the row shows Status: Not connected with a Retry button — click it to try again.
Site display
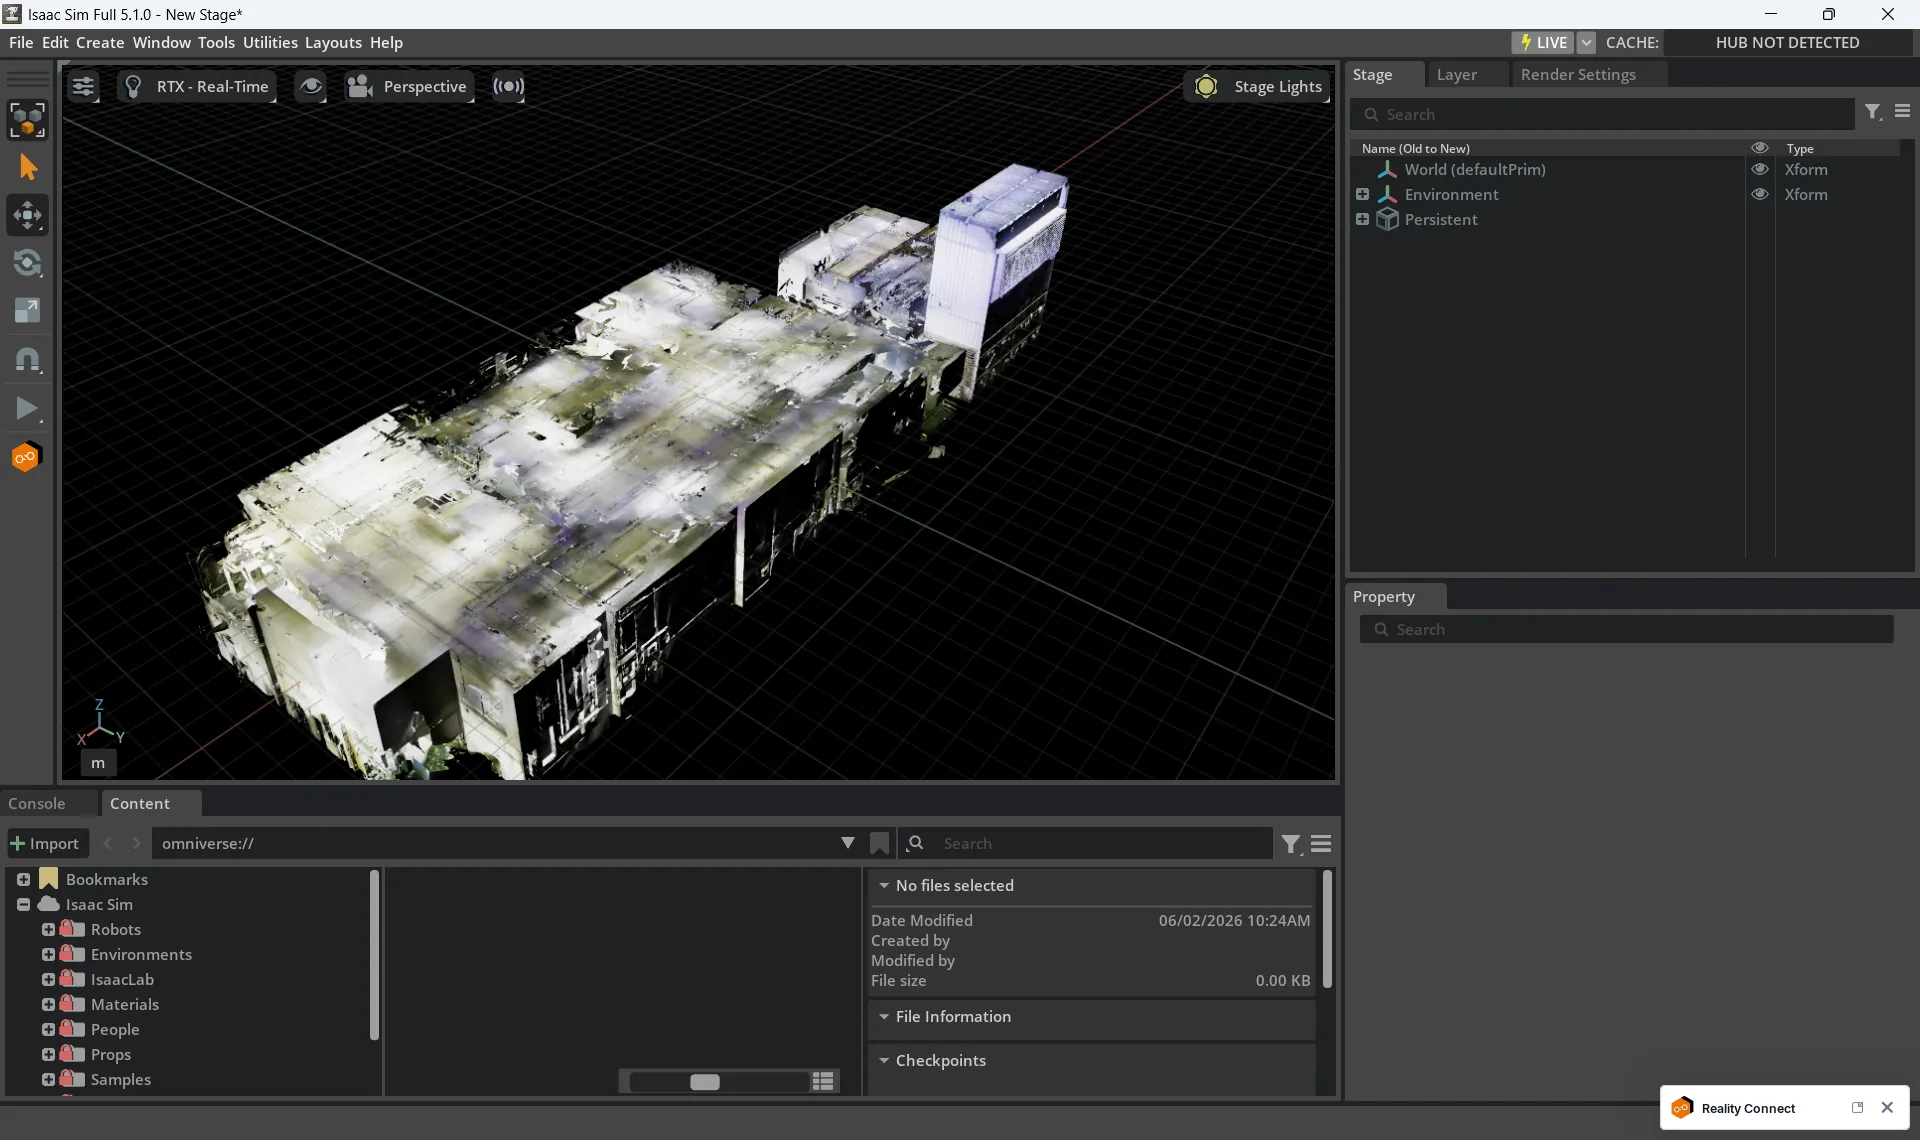
Section titled “Site display”The streamed RealityTwin environment gives you immediate site context in your stage.
-
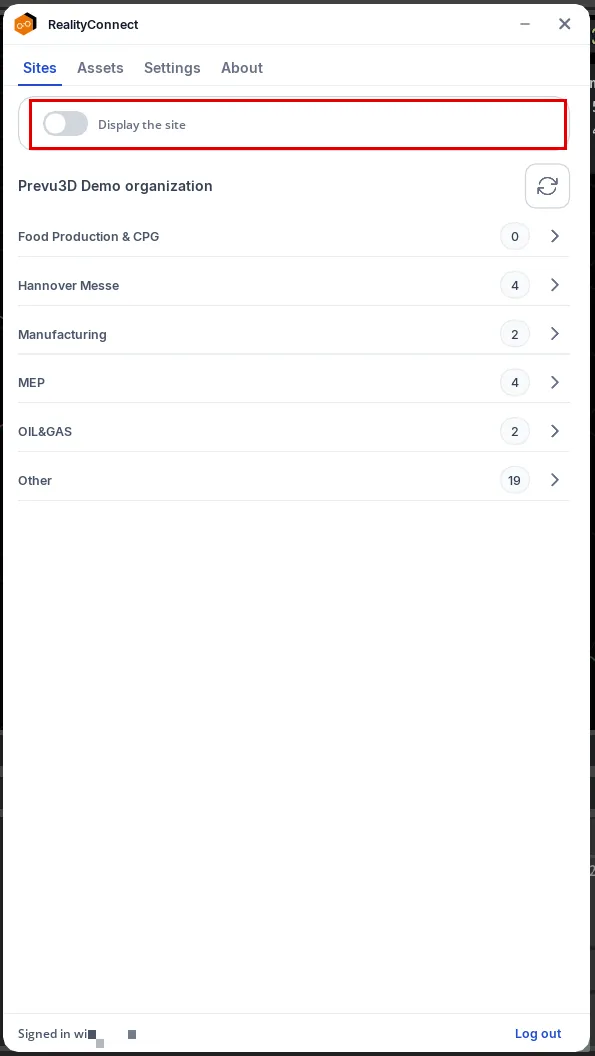
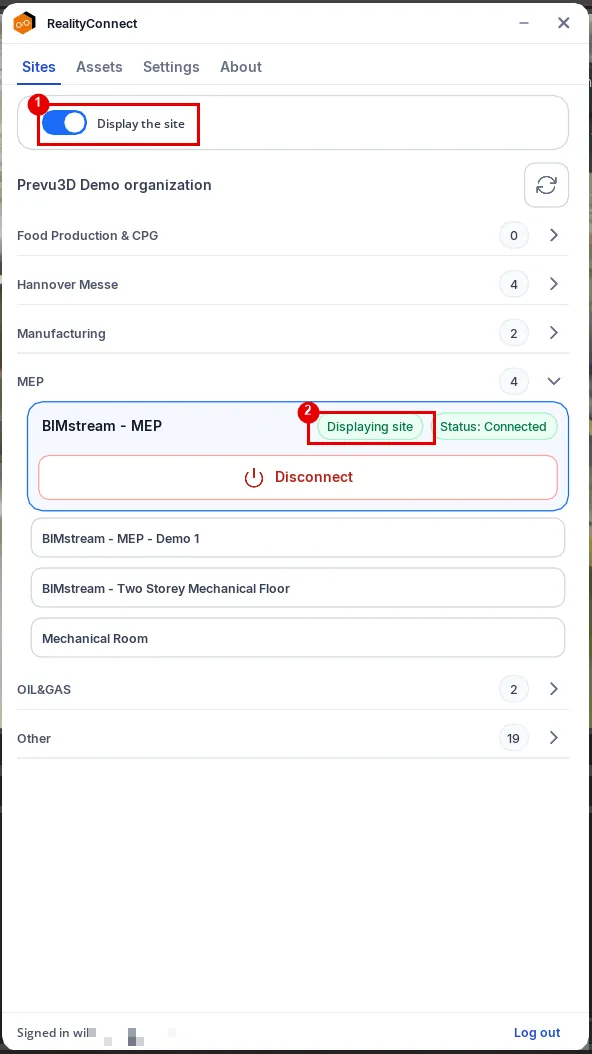
Show or hide the environment Use the Display the site toggle at the top of the Sites tab (it is also available on the connected-site card at the top of the Assets tab). The toggle becomes active once a twin is streaming.
-
In-memory streaming The environment streams entirely in memory, without creating or loading files on disk, keeping interaction fast and the impact on system resources low.
-
View-dependent refinement The scene is progressively refined based on the camera position, improving visual quality where it matters while maintaining smooth performance as you navigate.
-
Display the site toggle (on) — the environment is shown in your stage.
-
Displaying site — the connected row confirms the environment is visible. Turn the toggle off and it changes to Not displaying site: the environment is hidden, but the RealityTwin stays connected (Status: Connected), so you can show it again instantly without re-streaming.
Assets
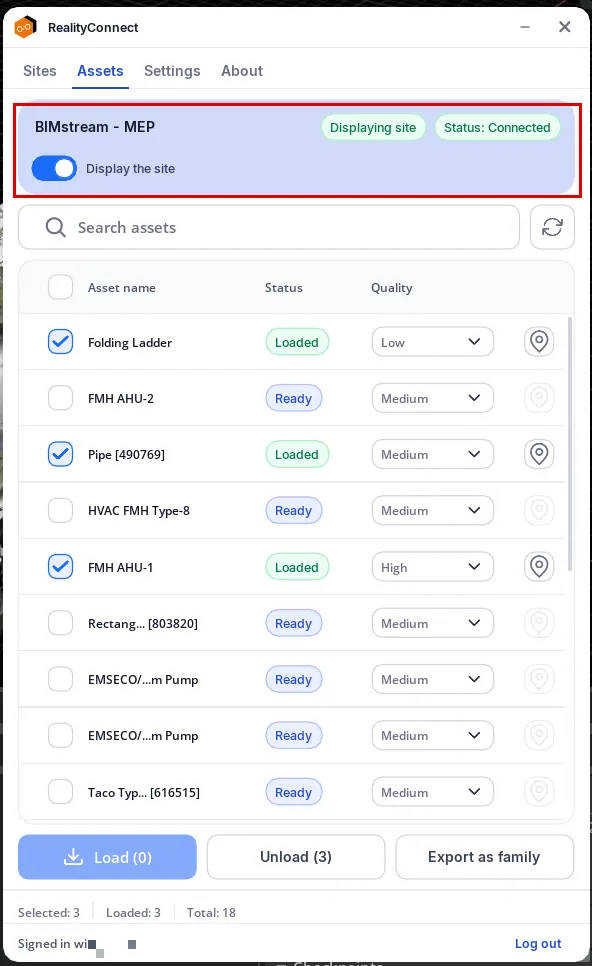
Section titled “Assets”The Assets tab lets you browse, load, and manage the Reality Assets attached to the connected RealityTwin. The card at the top of the tab shows the connected twin, its Display the site toggle, and the connection status. If no twin is connected, the tab shows No site connected with a Go to sites button.
Asset operations
Section titled “Asset operations”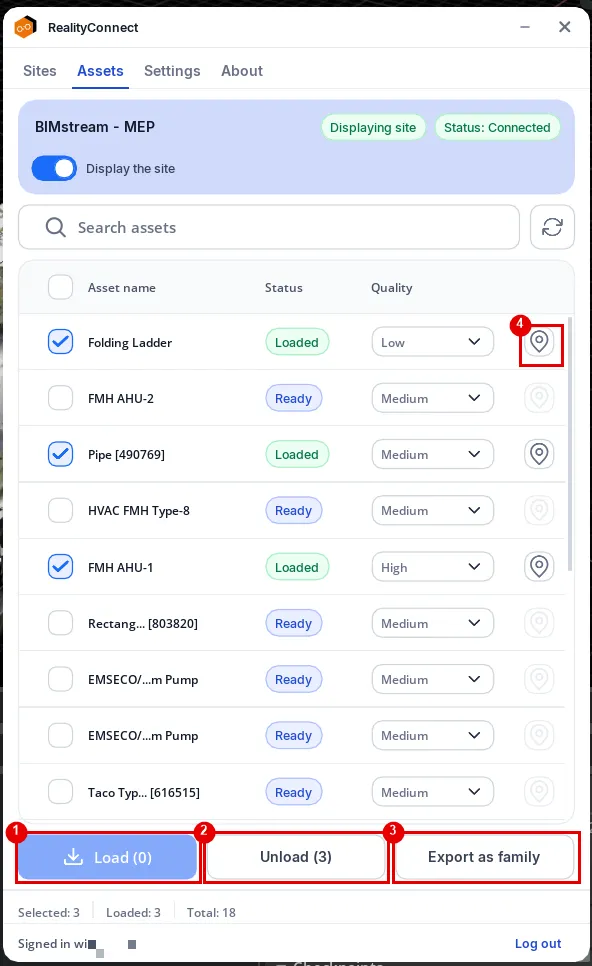
-
Load (N) — loads the assets you have selected, where N is the number of selected assets that are ready to load.
-
Unload (N) — removes the selected loaded assets from the stage. With nothing selected, this unloads all loaded assets. An unloaded asset stays available for re-loading later.
-
Export as USD — exports the selected loaded assets as USD. A file picker opens — “Export as USD - choose file name and format” — where you choose a destination and file name and click Export. A progress bar runs along the button while the export completes.
-
Locate — the pin icon on each row moves the camera to focus on that asset. It becomes available once the asset is Loaded.
Asset status
Section titled “Asset status”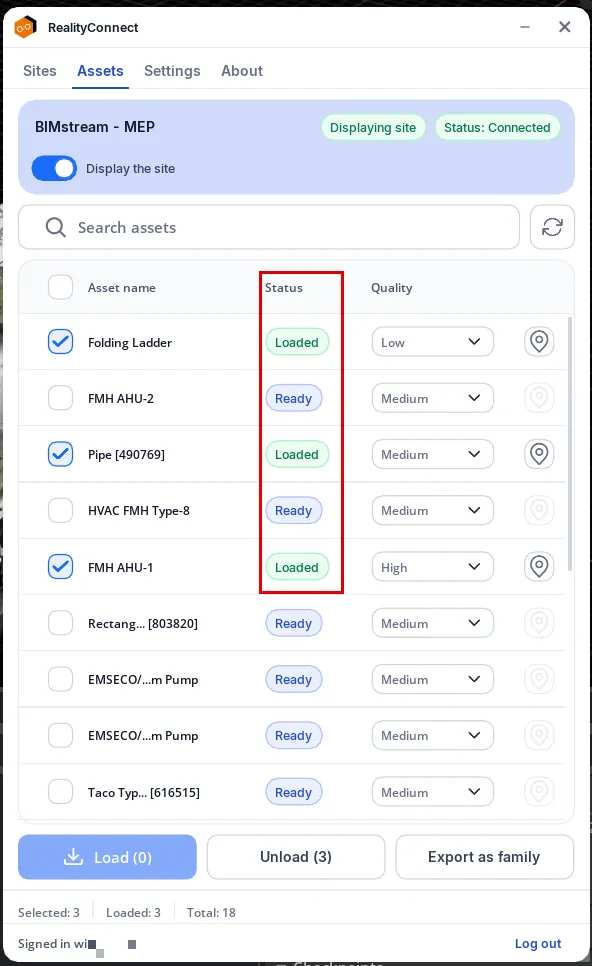
Each row shows the current state of its asset:
| Status | Meaning |
|---|---|
| Ready | The asset is available but not loaded. |
| Loading… | The asset is streaming in. Click the ✕ on the badge to cancel. |
| Loaded | The asset is in the stage. |
| Unloading… | The asset is being removed from the stage. |
| Error | The asset could not be loaded. Hover the badge to see the reason. |
Filtering and selecting assets
Section titled “Filtering and selecting assets”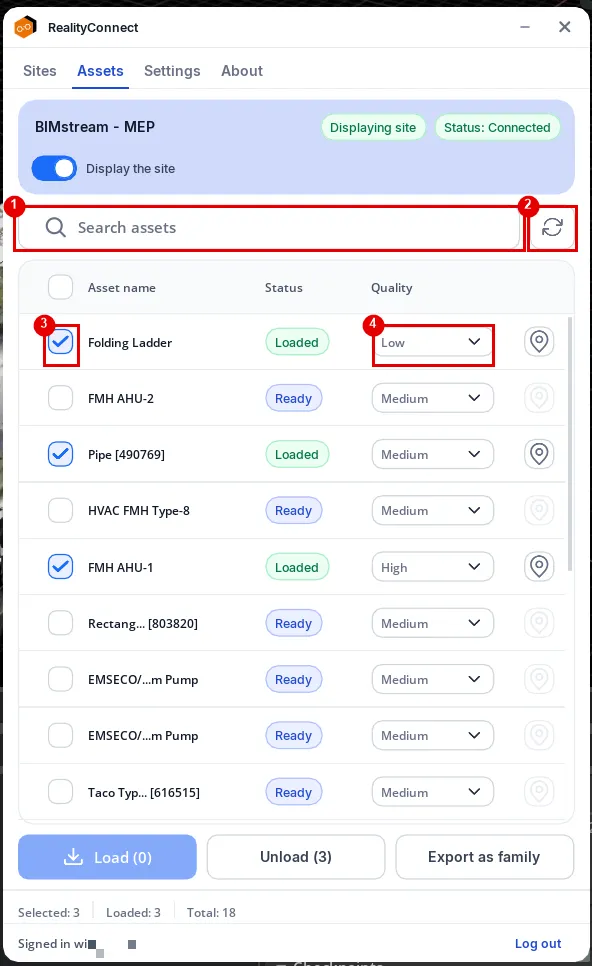
-
Search — type in the Search assets box to filter the list by name. Filtering happens as you type and is case-insensitive.
-
Refresh — reloads the asset list from the connected RealityTwin.
-
Select — tick a row’s checkbox to choose it (or the header checkbox to select every visible row) before loading or unloading.
-
Quality — each row has its own quality picker (Low, Medium, High). Set the quality you want before loading; the asset streams at that quality. You can mix qualities across a selection.
Asset count summary
Section titled “Asset count summary”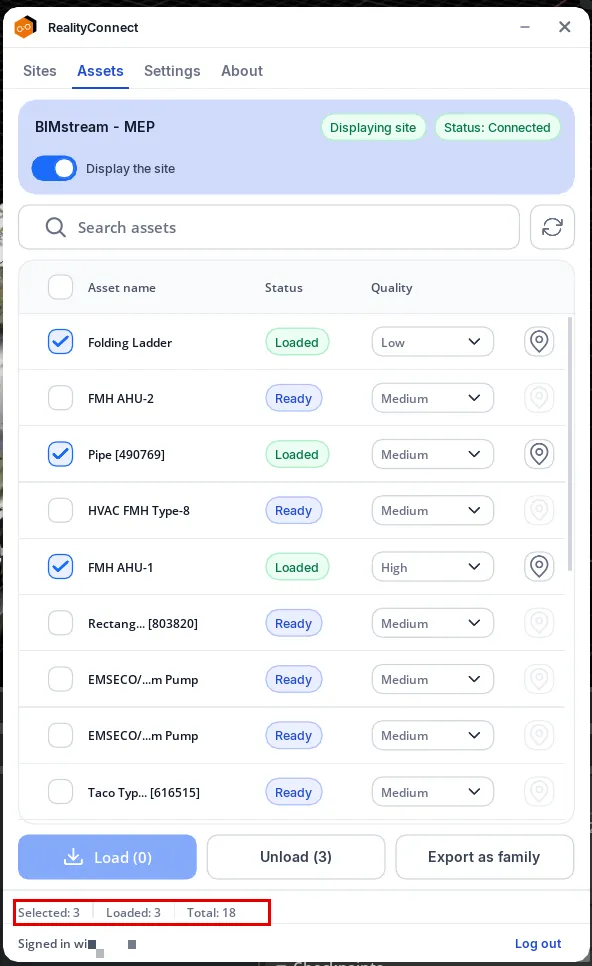
The footer shows live counts: Selected, Loaded, and Total. When a search filter hides rows, the total appears as a visible-over-full count (for example, Total: 12/50).
Settings
Section titled “Settings”The Settings tab controls the streaming quality of the environment and the language of the plugin interface.
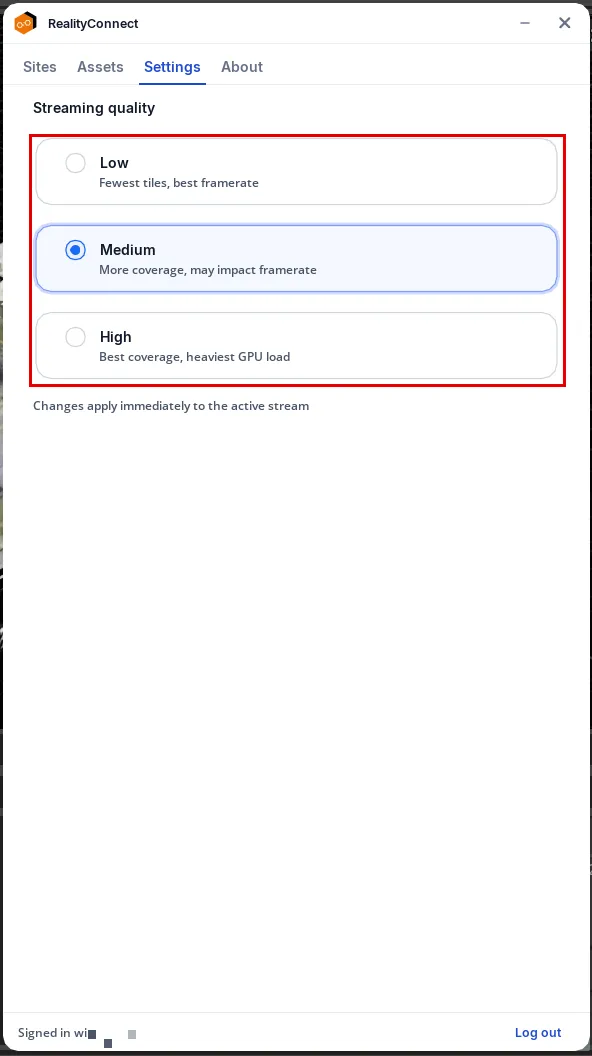
Streaming quality — choose the preset that matches your hardware and use case:
| Preset | Best for |
|---|---|
| Low | Fewest tiles, best framerate. |
| Medium | More coverage, may impact framerate. |
| High | Best coverage, heaviest GPU load. |
Changes apply immediately to the active stream; the stream briefly restarts to apply a new quality tier.
Language — choose the language of the RealityConnect interface. The plugin is available in English, French, Spanish, German, Japanese, Italian, Portuguese, Dutch, Korean, and Simplified Chinese. The panel updates to your chosen language right away.
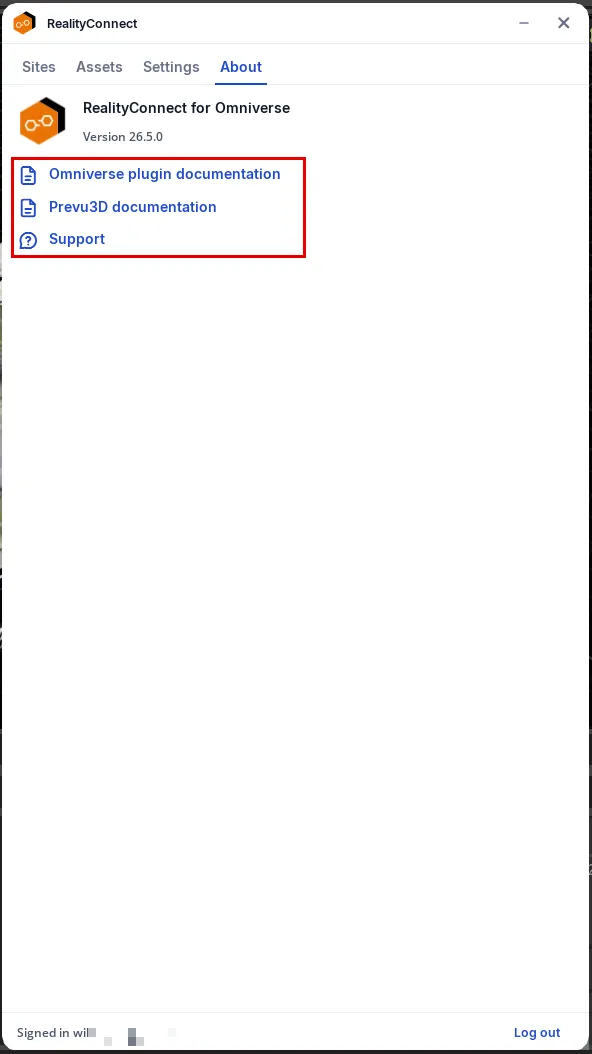
The About tab shows the installed plugin version and quick links to the Omniverse plugin documentation, the Prevu3D documentation, and Support.
Minimizing to the tray
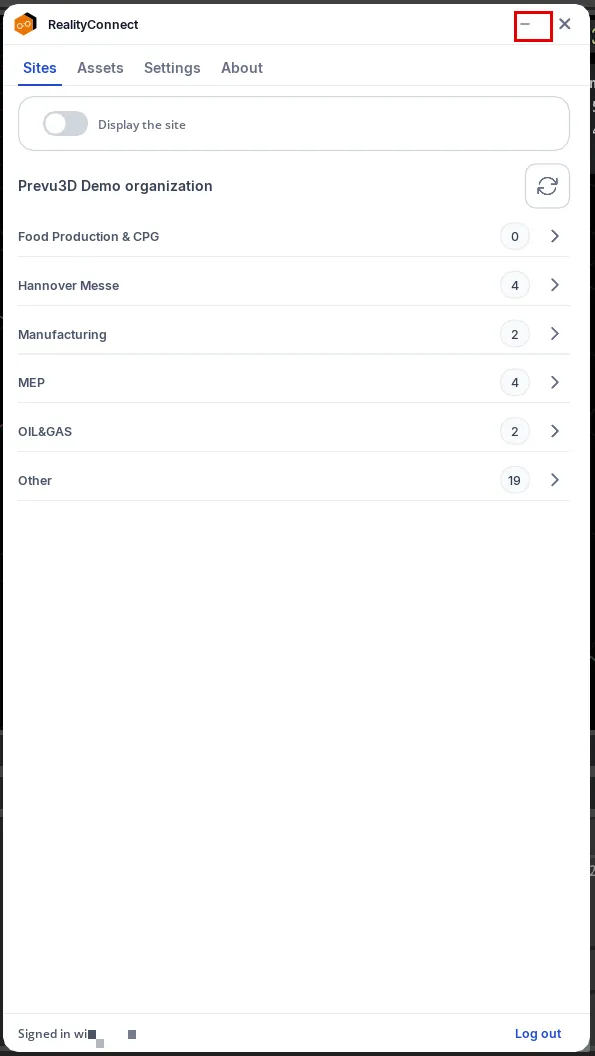
Section titled “Minimizing to the tray”Click the Minimize button in the panel header to collapse RealityConnect to a small tray docked at the bottom-right corner of the Omniverse window.
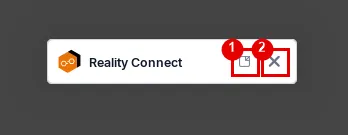
From the tray:
-
Restore — bring the panel back to its previous size and position.
-
Close — dismiss the tray.
Click Log out in the signed-in footer at any time to sign out of your Prevu3D account.